Today I am finally sharing a recipe for the siphon brewer. I will use a bit of technical jargon at times in this blog post. If you encounter a word you’re not familiar with, I recommend you consult Mitch Hale’s glossary.
The siphon method is far from being appropriate for most people’s daily routines, as it is harder to execute correctly, and it takes time and requires more maintenance and cleaning. But the siphon has a really neat advantage: it does not rely on gravity to drive water through the bed of coffee. Instead, air inside the lower chamber is heated, causing it to expand and push water in the upper chamber. When the heat source is interrupted and the air contracts back to normal, this creates a large pressure difference between the lower and upper chambers, and sucks back water through the coffee bed, even if the coffee is ground fine enough to completely clog a V60 brew.
These siphon mechanics open up a very interesting door: you can play with much finer grind sizes and much higher average extraction yields than a V60. The method I want to present you today leverages this to reach much higher extraction yields than what can typically be done with a V60 brew (think of extraction yields 24% and above), while still getting a very clean cup free of oil or fine coffee particles.
I am re-discovering a lot of the coffee stored in my freezer with this recipe; not all of them react very well to these very high extraction yields however. I recommend using this recipe only with coffee beans with very well developed roasts. Otherwise, some woody or astringent tastes may appear much more dominantly than they would in a ~20-22% extraction yield V60. When I receive a new bag of coffee I never tried, I won’t go directly try this siphon recipe on it. Instead, I’ll make a V60 with my usual Rao-style recipe, and if I notice that I can reach higher extraction yields than most other coffee (e.g., 22%), then I will try brewing it with this siphon recipe.
There are a few coffees that yielded great to amazing results with this method for me: The Buufata Konga Ethiopian and the Gesha Village 2018 Wet Processed both roasted by Passenger; the Mamuto AA Kenyan roasted by George Howell; the Kayon Mountain Ethiopian roasted by 49th Parallel; the Kiandu AB Kenyan roasted by Heart; and the Karogoto Kenyan roasted by Tim Wendelboe. All of them produced average extraction yields between 23.2% and 24.6% with this recipe and my Forté grinder, when calculated with the simple percolation equation (I’ll discuss this more below). However, in my experience very few roasters that I have tried were able to pull amazing roasts several times in a row even when I ordered the same bag of coffee a month later. I’ve only tried a single batch of each of these coffees and they turned out great, but I don’t know whether they will always be great. I also don’t know either of these roasters well enough to make any prediction about this.
I have been trying to use finer grind sizes with the siphon for four months now, with the goal of achieving higher extraction yields, but I was struggling to avoid fines getting in the beverage and to obtain good-tasting brews. As you will see, it turns out that I was failing because I was not being bold enough; there is a valley in grind sizes, from espresso to a bit finer than V60, where coffee fines can sneak through the Hario filter holders. And this led me to believe I could not use a grind size as fine as I hoped with the siphon.
You might be wondering why I would even want to try grinding finer in the first place. To understand the thought process, I recommend reading my post on The Dynamics of Coffee Extraction. It explains why grinding finer will allow you to reach higher average extraction yields and also more even extractions – this is something Matt Perger has been shouting from the rooftops for a while now, but I only recently heard about it.
I have also recently been experimenting Dan Eils’ Vac60 prototype which he generously sent me, and this led me to explore and think about finer grind sizes again. My friend Mitch Hale had also been taunting me with his 26+% extraction yield Turkish brews made with his fantastic EG-1 grinder that everyone is jealous of. All of this led me to try grinding Turkish style for my siphon – Mitch also helped me figure out whether my Forté could actually do it, and turns out it can. These experiments finally allowed me to brew the first high-extraction yield siphon that I really enjoyed, about 60 siphon brews later. If you are a regular siphon user, you may find this recipe somewhat weird or shocking, but please try it before judging 🙂 I especially recommend it for very soluble coffee that doesn’t taste roasty (i.e., try it on great roasts).
The basic idea behind this recipe is that we want to grind as fine as we can and prepare an immersion-style brew similar to Turkish and quickly reach a very high extraction yield, then filter out the oil and coffee fines to get a clean beverage. To achieve this, regular cloth filters are not great because they don’t filter out all the oil. Plus, they are a total nightmare to clean and maintain – they quickly develop a rancid taste, and they can even easily develop mold from their constant contact with water. If you insist on using them, please read the Cloth Filters section at the end of this article, but I honestly have not made a great brew with them even after going through a pack of 10 brand new Hario cloth filters.
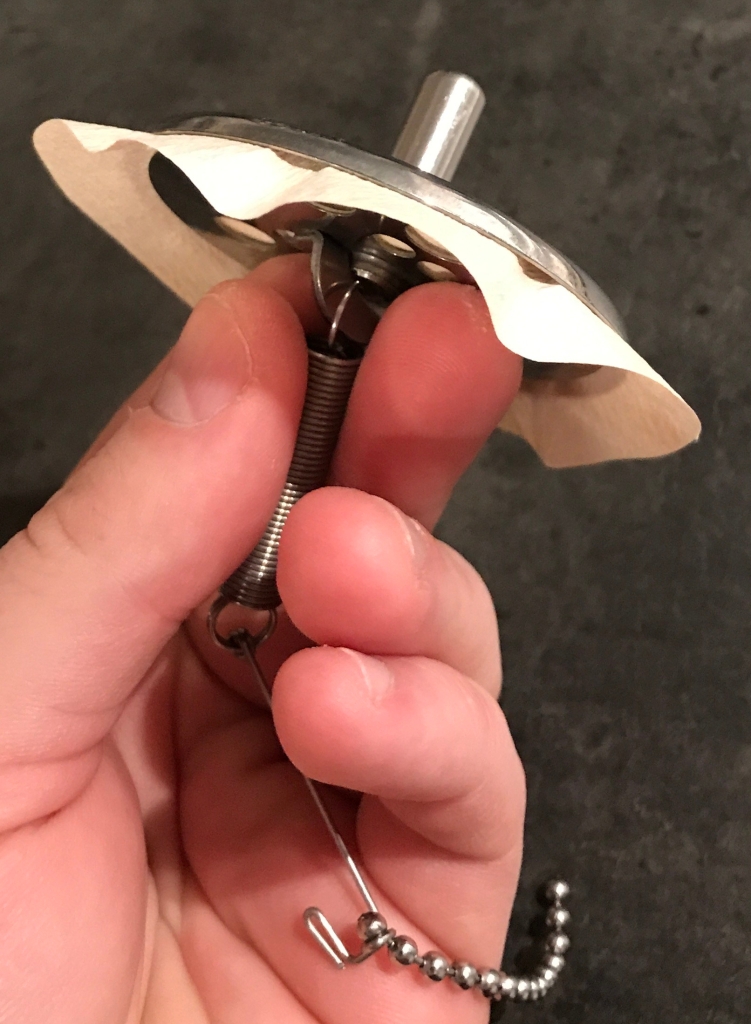
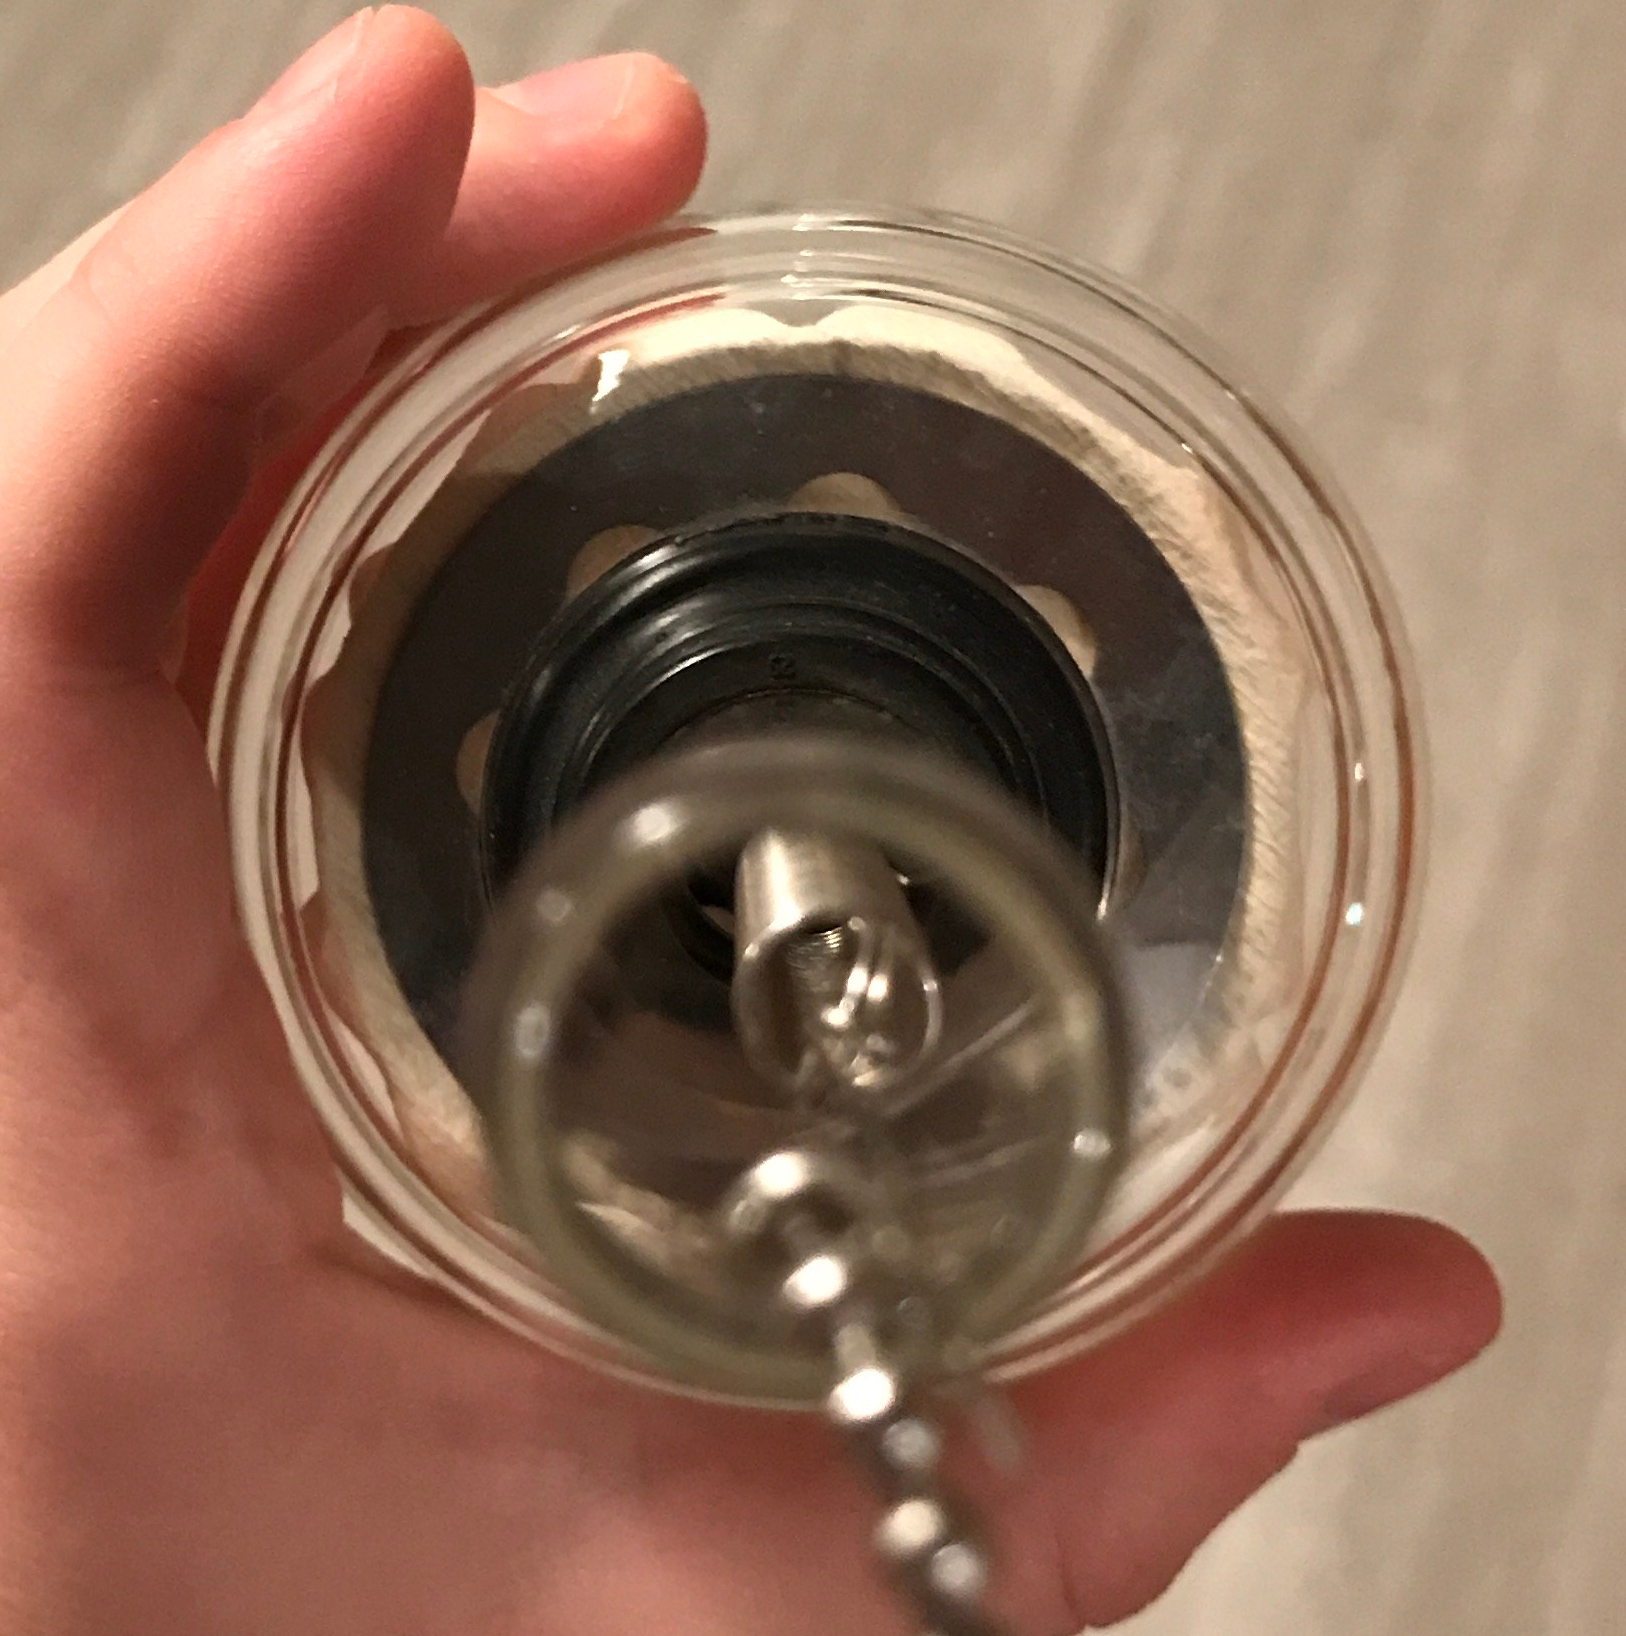
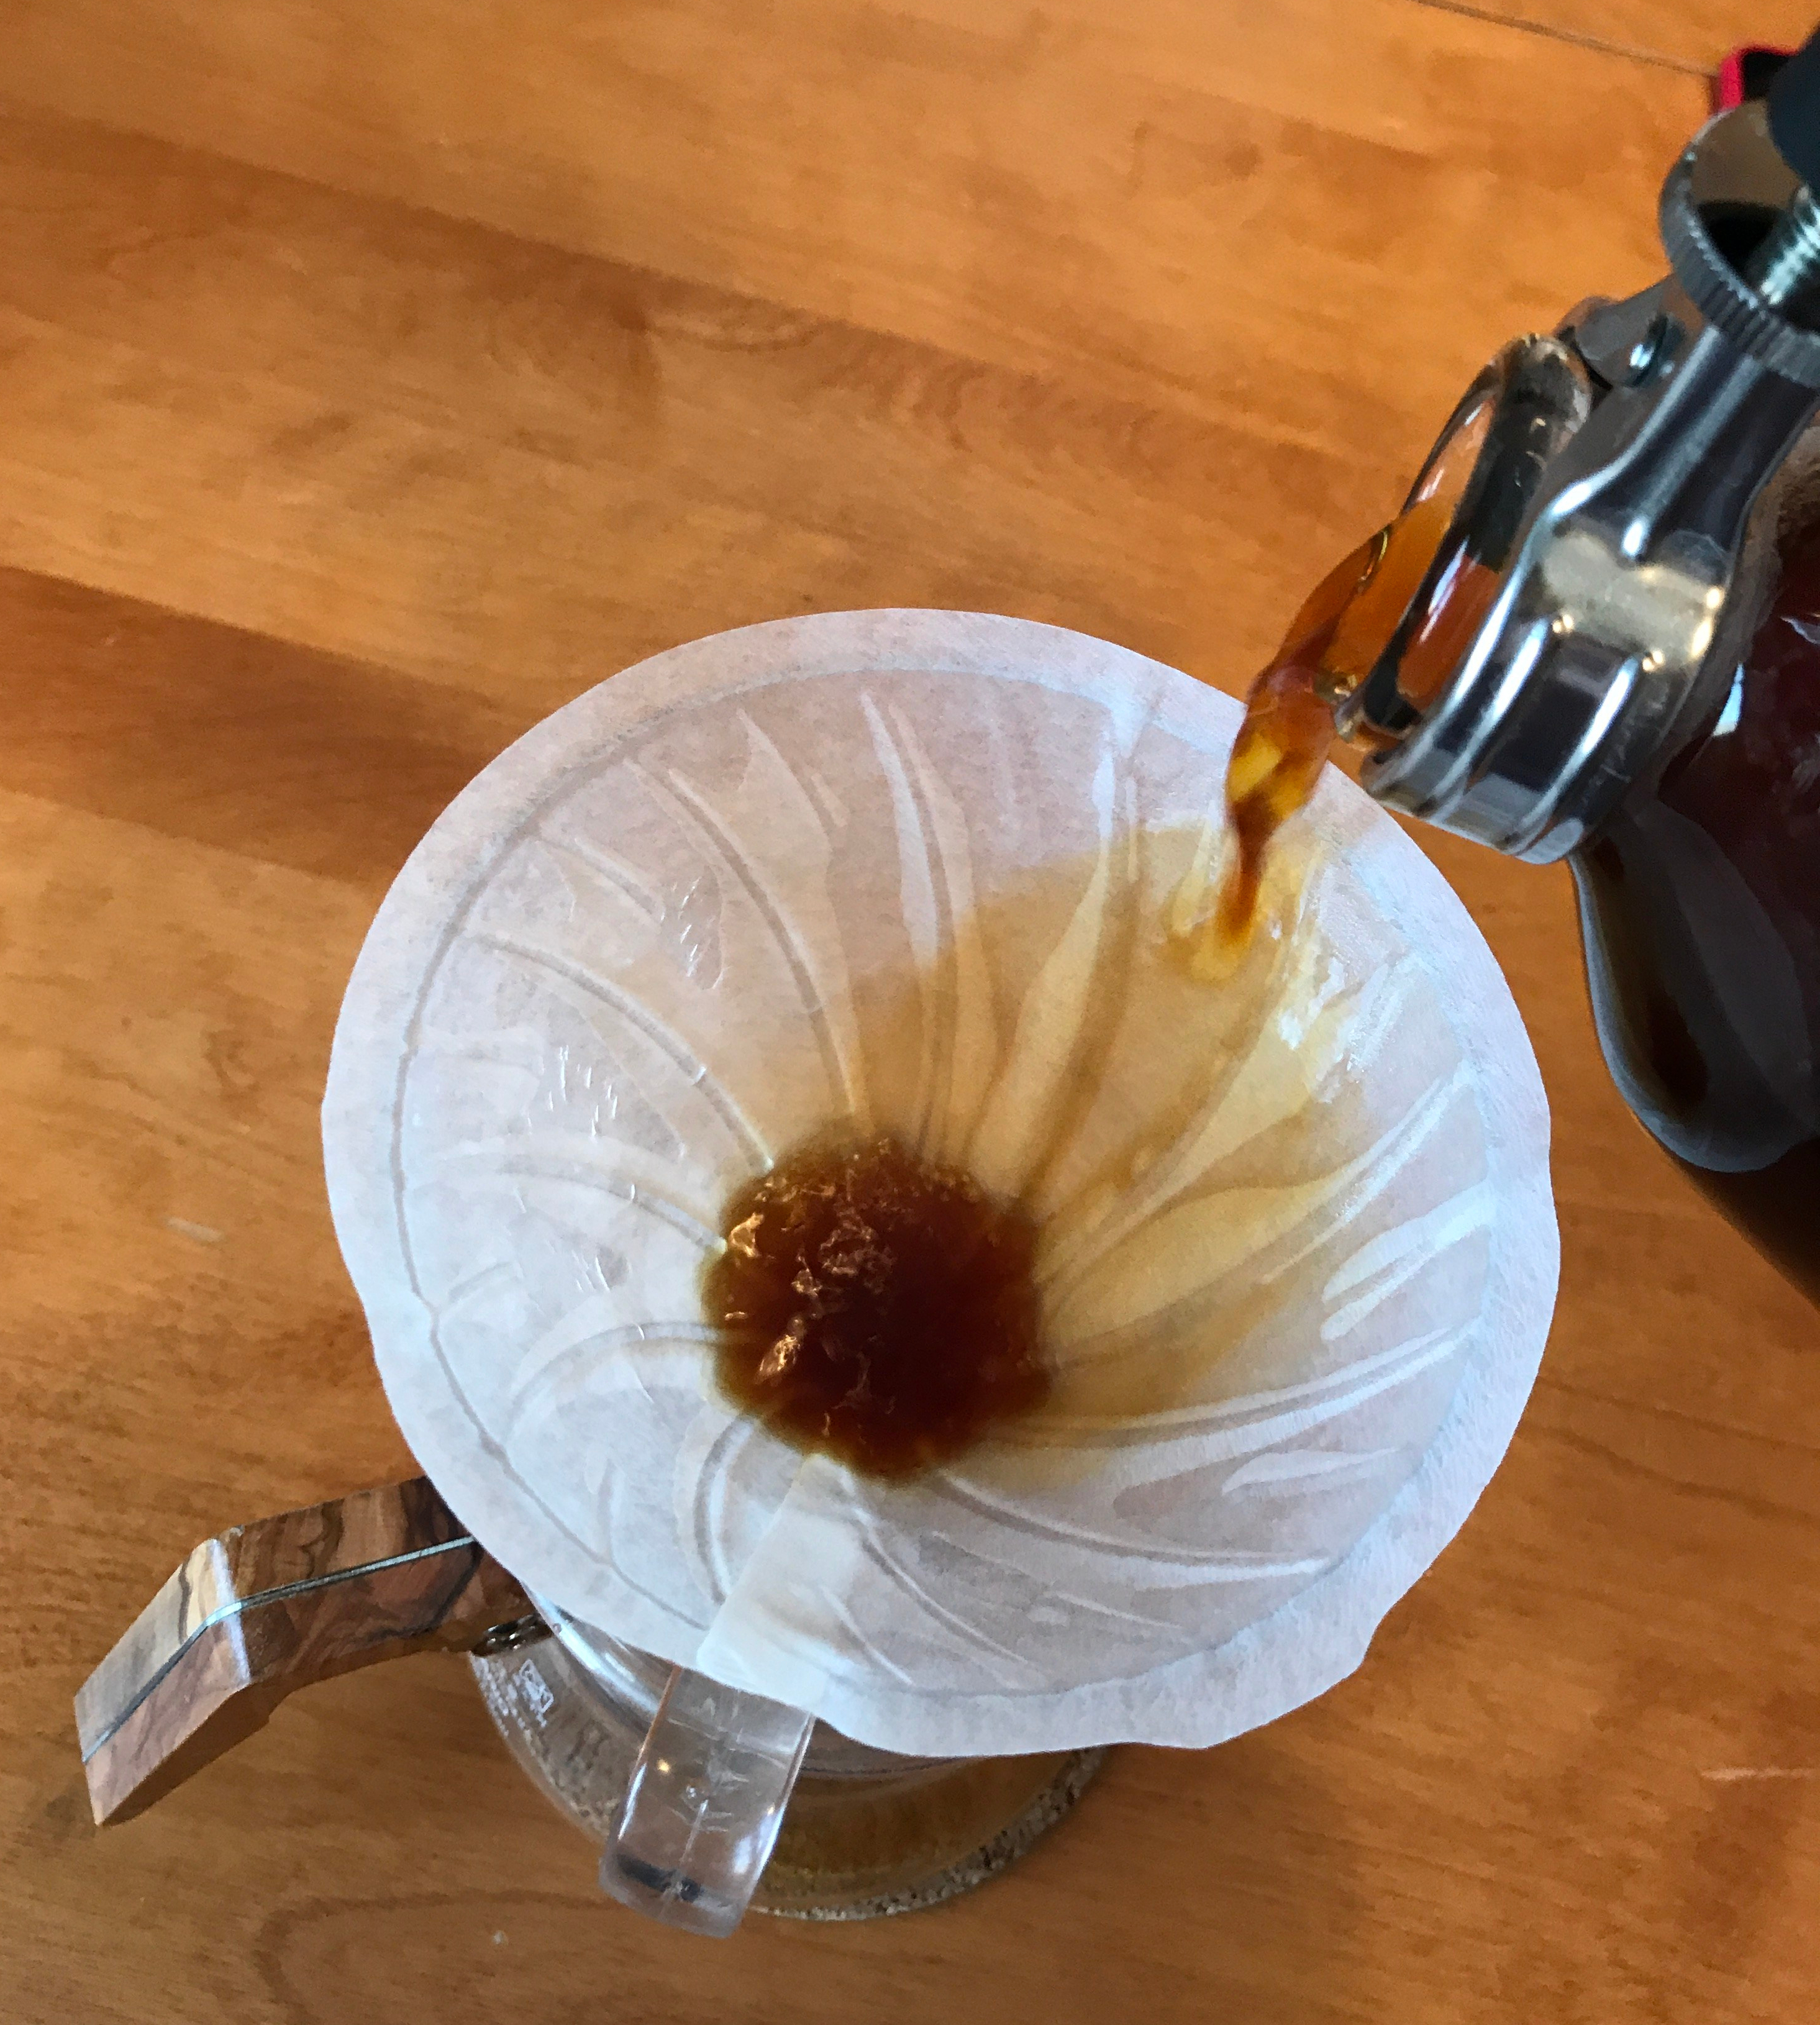
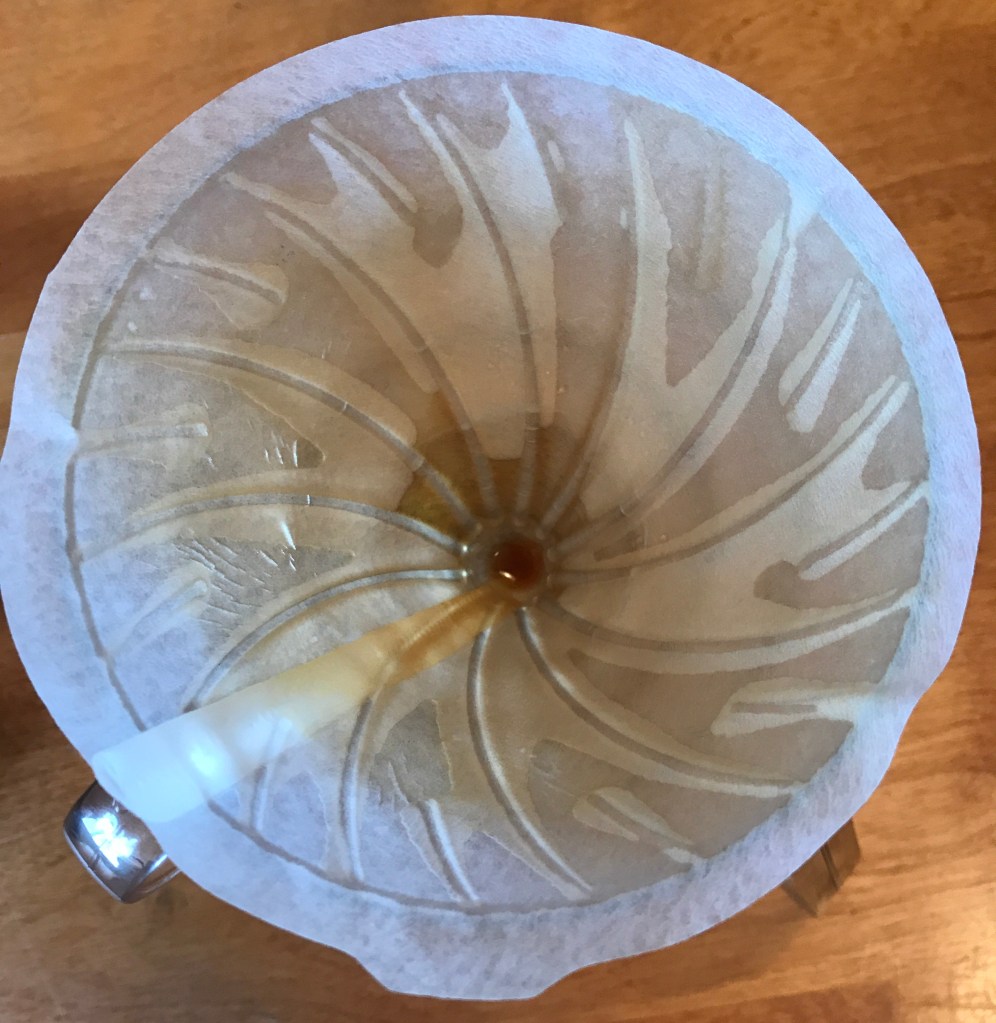
Fortunately, paper filters can be used with this recipe, and I find that they produce better coffee. They are also way easier to maintain: you just need to pre-rinse them, brew your coffee, then carefully throw them in the garbage. Unfortunately, the design of the Hario paper filter holder is not too optimal in my opinion. The central screw (WHY ?) allows fines to go through if you grind just a bit finer than V60 brews. But as mentioned earlier, what I recently discovered is that if you grind much finer, you don’t get this problem – the coffee bed becomes much more cohesive (probably because of the surface tension of water) and forms some kind of paste that stops getting around the edges of the filter holder.
One key point of this recipe is that the coffee bed itself is used as a filter, in addition to the paper filter. As long as a small layer of coffee grounds deposit on the paper filter fast enough before the start of the drawdown phase, the rest of the beverage will be filtered out of coffee fines by the bed of coffee itself. The paper filter is still important to absorb coffee oils, an effect that you would not get with a metal filter – I also suspect fines may pass through the metal filter, but I have not tried.
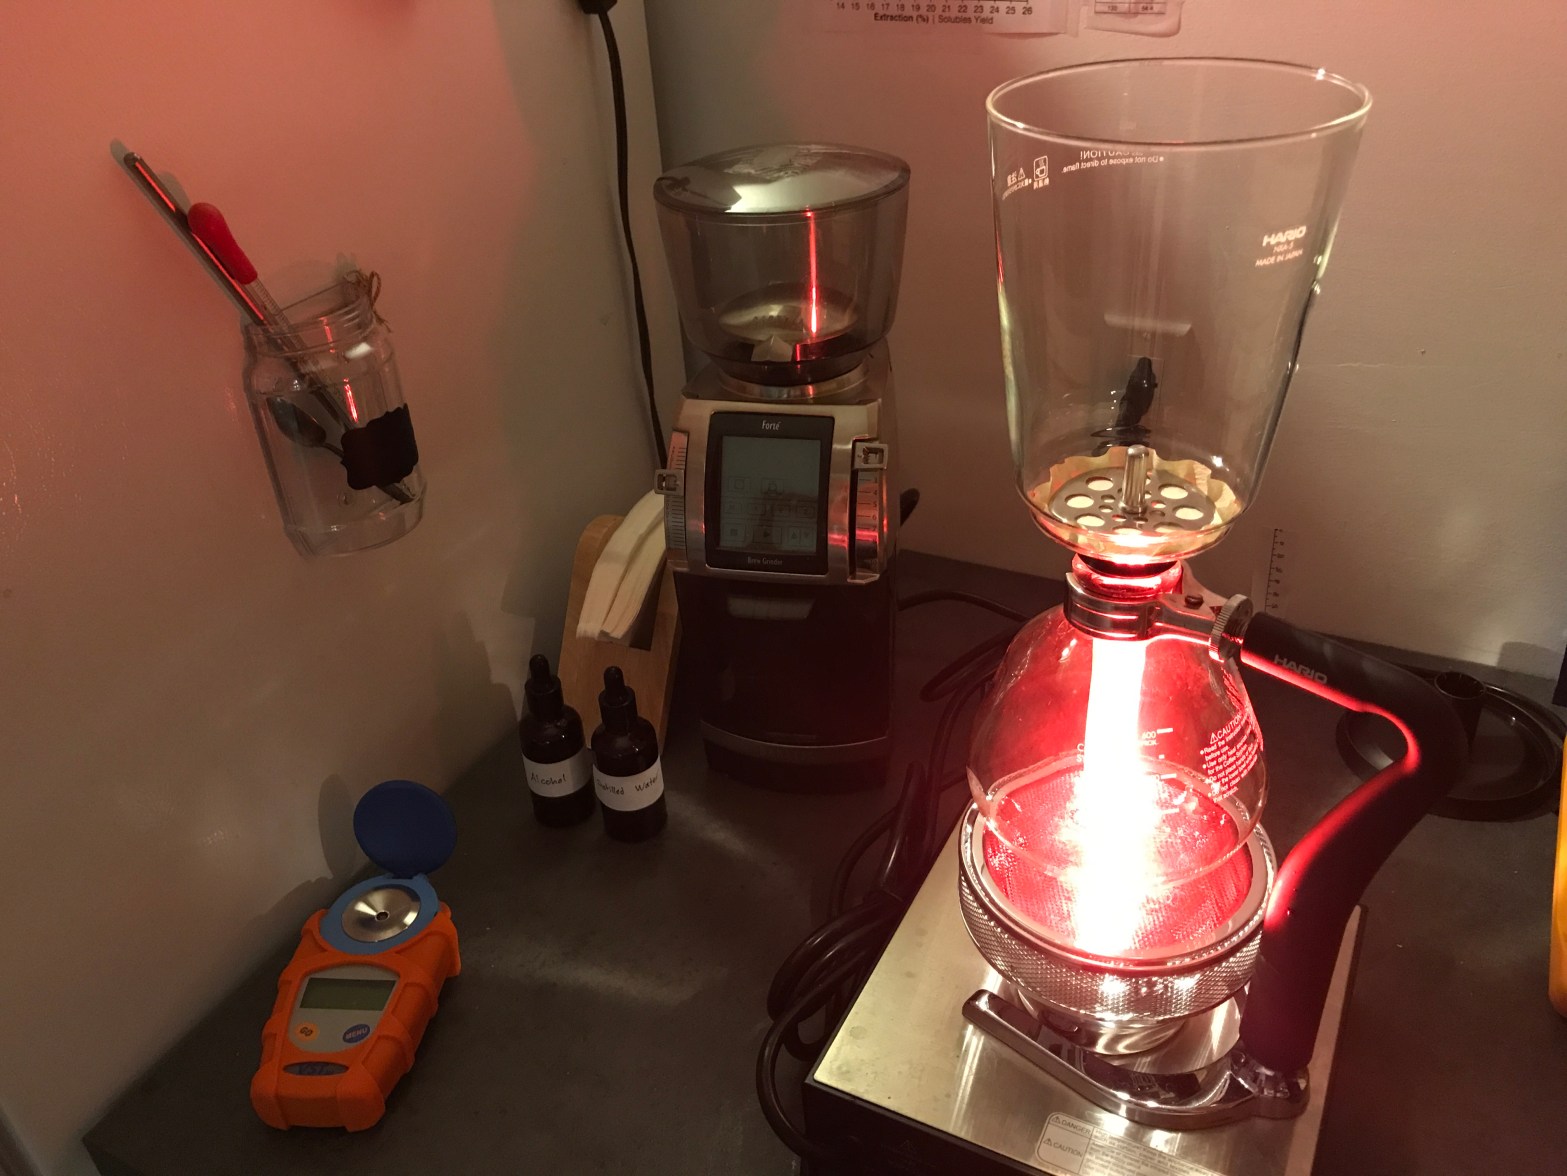
List of Required Material
- A siphon brewer: I use the Hario Next 5-cup, but I recommend the Hario Technica three-cup if you never brew large batches.
- A bamboo paddle or any other kind of similar stirring object (ideally food grade and not thermally conductive).
- The Hario paper filter holder and some paper filters.
- A heat source: I use the Hario beam heater, but butane heaters should also work. I do not think alcohol heaters would be powerful enough. The “Hario Smart” beam heater works too and is sometimes the only one available, but it is way more expensive.
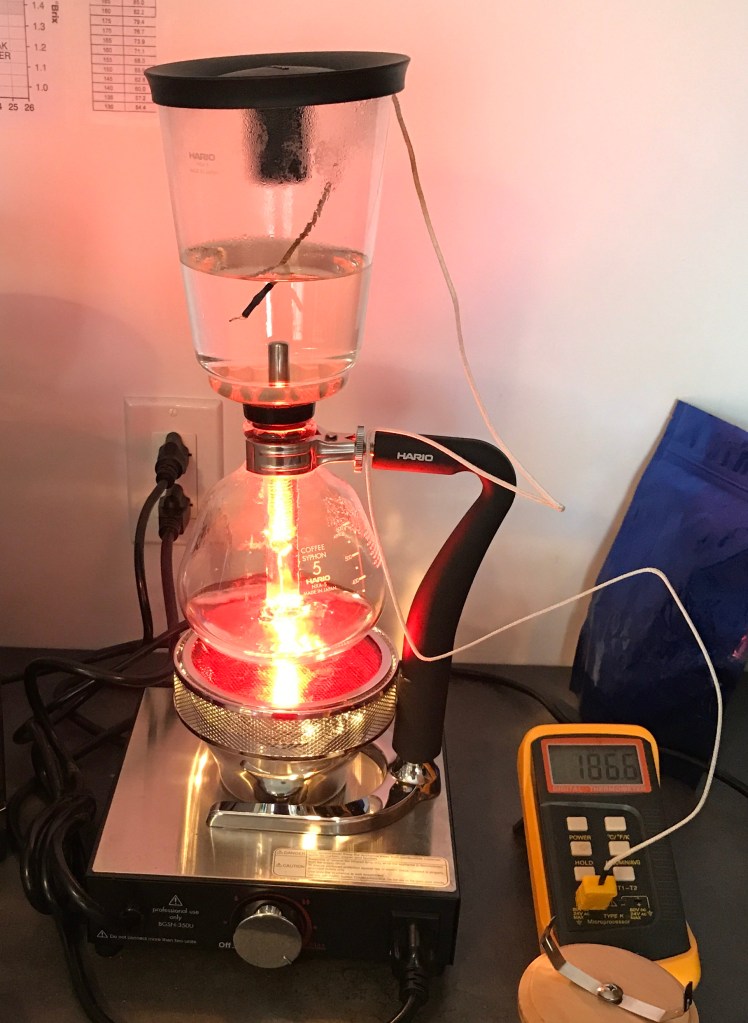
- A bead temperature probe. This may seem overkill, but it is not. I find it extremely hard to brew a consistent siphon without it, and without it is also very easy to brew coffee at 180℉ without noticing. A kitchen heat thermometer can work, but it will be much more of a hassle, and much slower because you won’t be able to put the plastic lid on top of the upper chamber to keep the heat in.
- Some brew water – I like to use the Rao/Perger water recipe. For more detail, see my blog post on brew water.
- Any clean kettle. If you are extremely patient you could do without by heating water directly with your beam heater or butane heater.
- A brewing scale. I use the Acaia Pearl scale which is neat because it’s large enough to put the Siphon on, but I’m sure you can get around with other less expensive scales, just make sure you get one precise at 0.1g or better.
- A timer, unless your scale can act as one.
- A grinder that can grind extremely fine. I use the Baratza Forté BG grinder which can grind fine enough only when the zero position is well calibrated (more on that below). I suspect the Encore and Virtuoso could also do it, but I don’t know. The more expensive grinders like Mahlkonig EK43 or Lyn Weber’s EG-1 can do it better than my Forté (for a LOT more money), but with the EK43 you will typically needs to align the burrs for that. Going this fine with a manual grinder would certainly be a huge pain when it’s even possible.
- A small container to hold your dose of coffee beans or ground coffee.
- Tabbed and bleached Hario V60 filters (not crucial but they can be useful, more information below).
- Some OxiClean for the occasional maintenance of your siphon glass. Soap can work but it is not as effective.
- I suggest always keeping a kitchen towel near your brewing space in case the lower chamber of the siphon loosens when it is hot.
- A bottle brush to clean up the lower chamber of the siphon.
- A lens blower to help clean up your grinder. This is facultative but it really helps especially when grinding Turkish style.
- A “not a flamethrower” by the Boring company.
Grind Size
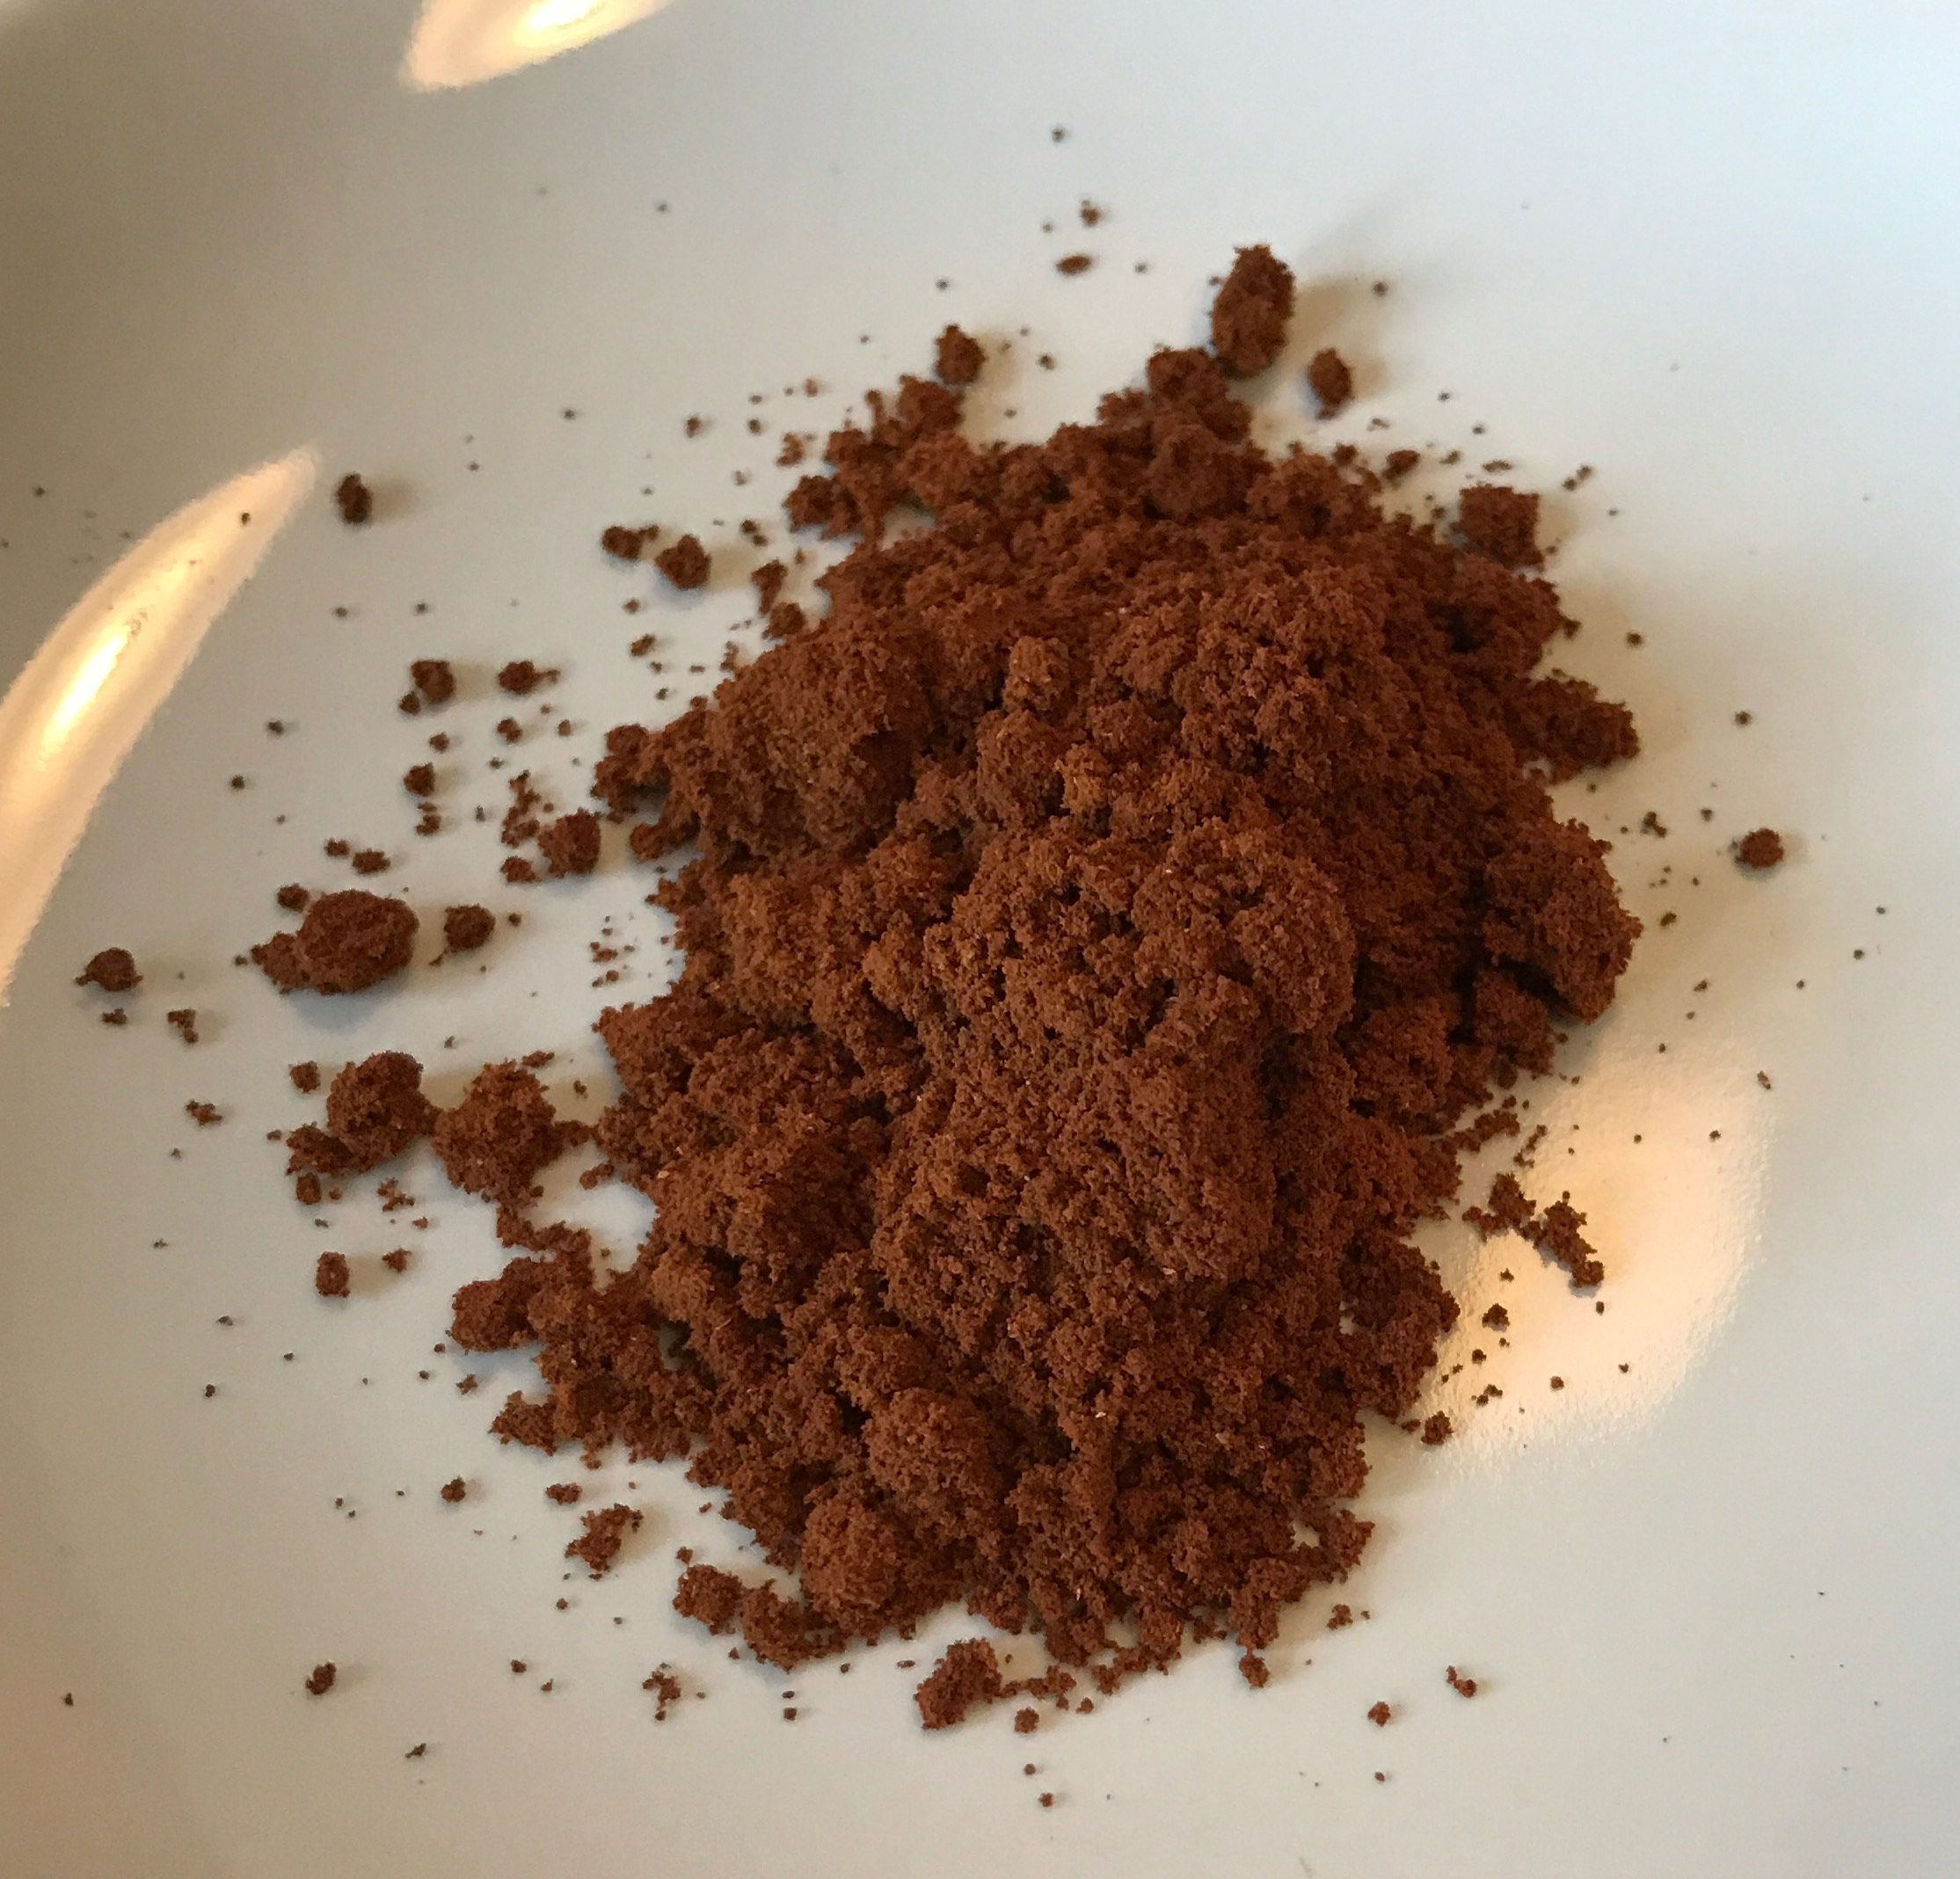
You will want to grind extremely fine for this recipe. The grind size should be finer than espresso and similar to Turkish brews. It should look and feel like flour, and form clumps. You should be able to see your fingerprint if you press a finger on a bunch of ground coffee (see picture below). On my Forté, 1A was not fine enough with its initial calibration so I had to re-zero it with the burr calibration tool. Please follow the Baratza user manual if you do this. Here’s where I set mine: turn the calibration screw until you just very barely start hearing the burrs touching at setting 1M, then use setting 1I (letter i) for this recipe. When the calibration tool is not inserted, I do not hear the burrs touching at 1M, but I do hear them touch at 1I. Please be aware that doing this will mess up all your previously cataloged grind size setups, sorry. The only reason I don’t go finer is because I don’t want to put too much strain on my Forté’s motor; Mitch has been grinding much finer than I do with great results (and higher extraction yields), so I suspect that there is no grind size that is “too fine” for this recipe.

Grinding this fine means that your grinder may retain a lot of ground coffee, depending on its internal structure. For example, my Baratza Forté retains about 1.5 grams with this setting. Because of this, I recommend either grinding about 2 grams of the coffee you are about to use and throwing away what comes out – it’s mostly coffee from the last time you brewed. Another way to do this even better is to turn on the (empty) grinder, move the grind size up to the coarsest setting, and wait for the old coffee to come out. You can then move the grind size back to the desired setting while the grinder is running, and then turn the grinder off.
Preparing the Filter and Workspace
First, make sure you have some un-cluttered space on your counter in front of the beam heater. You’ll need to quickly remove the siphon from the beam heater at some point, and put it down somewhere nearby. If you use the butane burner, it might be easier to move the burner instead, so this might not apply to you. I once had the genius idea to try using a thick cork pot stand and put it on the beam heater right after I turn it off to avoid having to move the siphon at all, but it turns that out even once it’s turned off, the beam heater is crazy hot, and it completely burned the cork stand. I suggest you don’t try this and set your house on fire. If this is your first time using the siphon, I suggest checking that your counter is level; otherwise it could affect channeling in the drawdown phase.
Check that the lower chamber of the siphon is well attached to its stand. I have the Hario Next model, and this part is a little finicky – pushing too much on the upper chamber can cause the lower chamber to come off from the stand, which could be a huge problem when it’s full of hot water. Now that you did that, fill the bottom chamber of the siphon with hot tap water. This will help speed up the brewing process.
Make sure the plastic lid of your siphon (also used as a stand for the upper chamber) is clean and free of water or old coffee. One of the quickest ways to turn your brew to shit is to forget some old coffee at the bottom of the lid and put it on top of your siphon. One way to be sure you don’t do this is to put the lid upside down on the counter after you cleaned it. Also make sure all parts of your siphon are clean and free of coffee oil stains. See the section on clean up and maintenance otherwise.
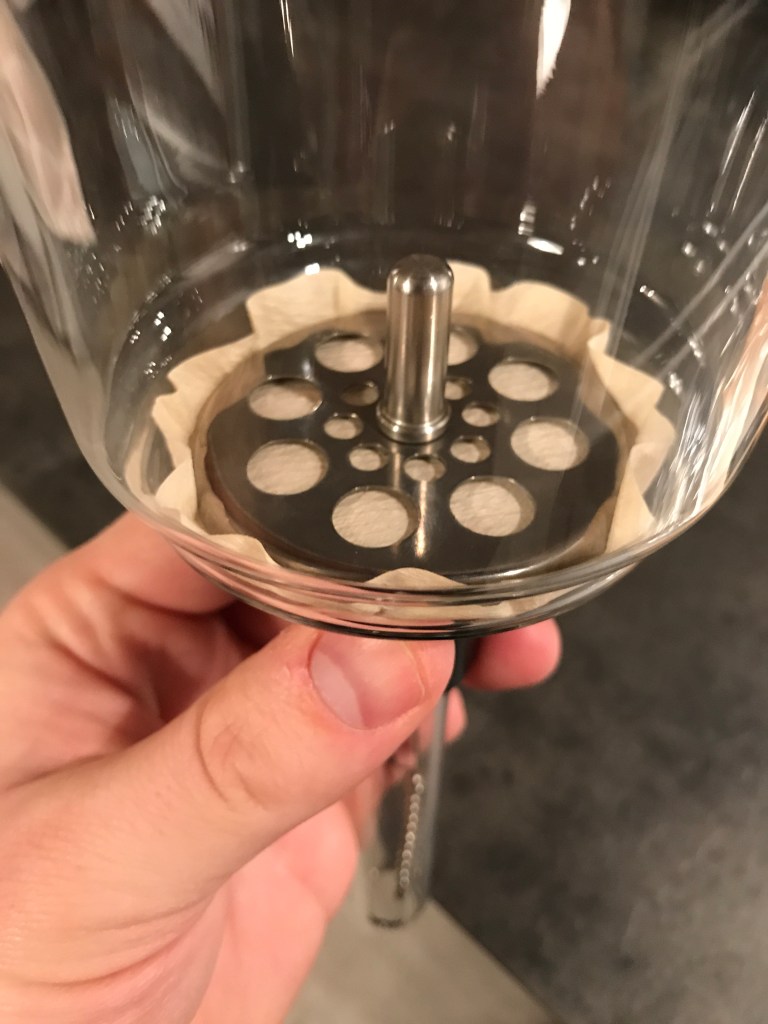
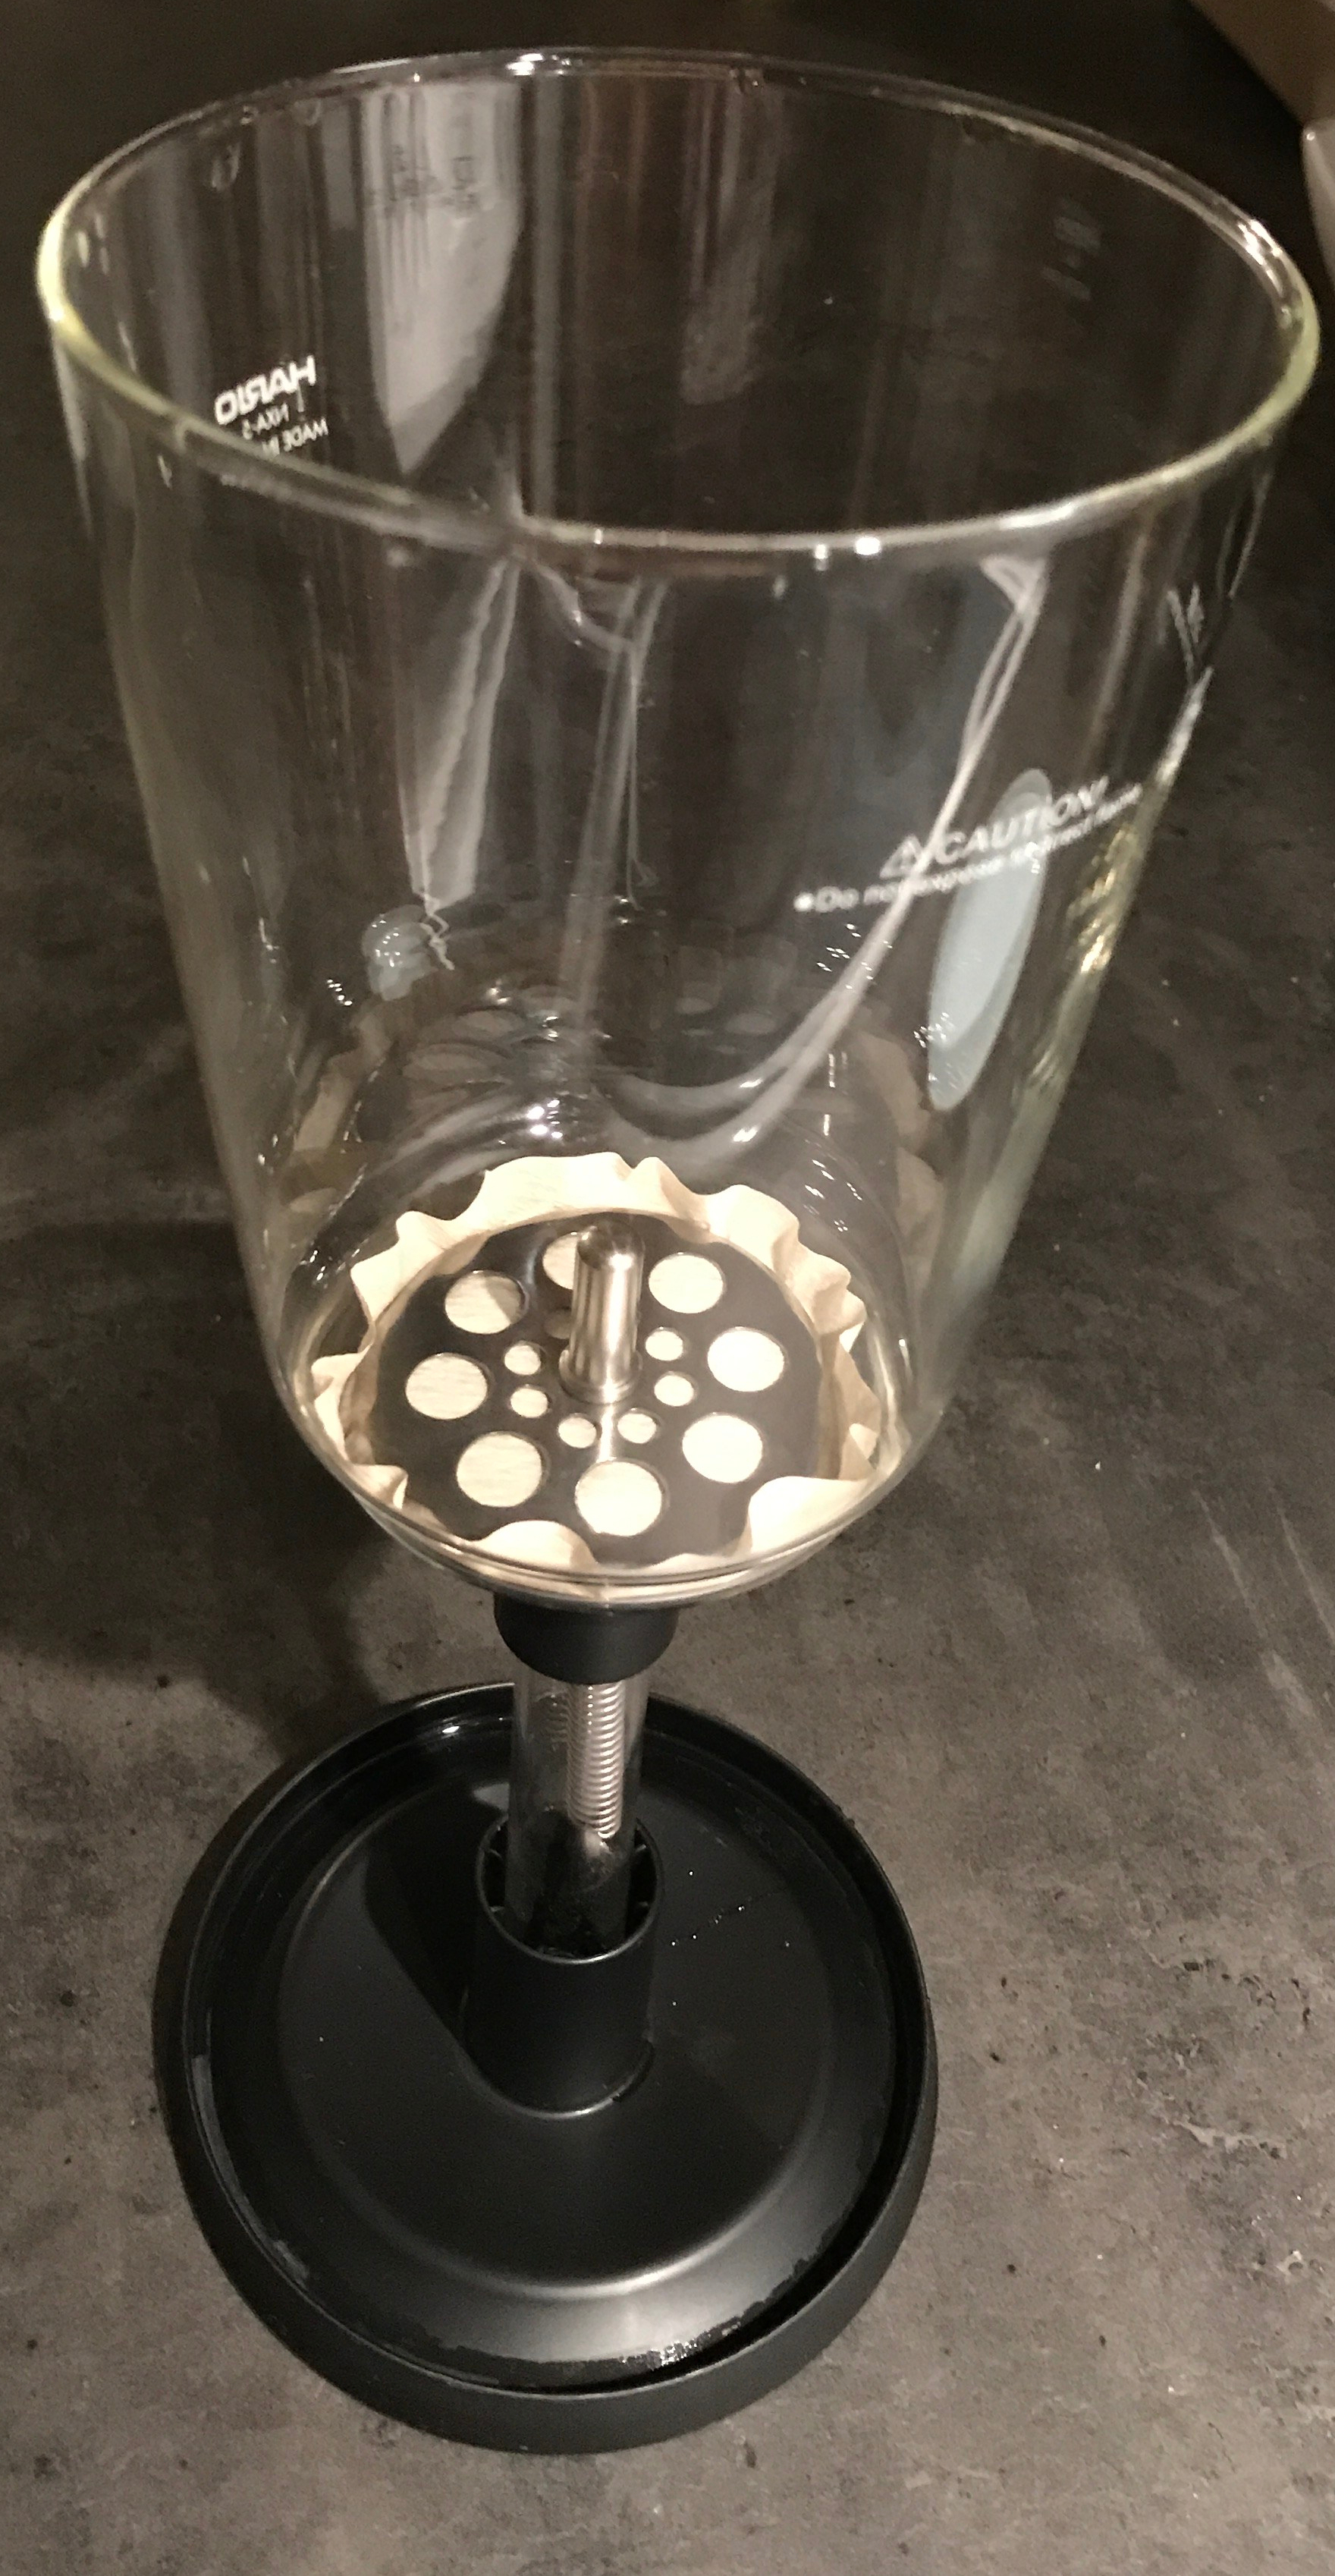
Mount the paper filter on the filter stand, and gently fold the paper up without straining the edges. Make sure the holes on both sides of the filter holder are aligned by looking through the filter toward a bright source of light. If you can’t see them you can gently wet the filter a little bit. This step is crucial because mis-aligned holes will allow less flow of water and this will increase channeling around the filter holder. Place it in the upper chamber of the siphon – the paper should be folding up, not down.
Pull the hook and put it in place, then make sure the filter stand is centered by looking at the bottom of the siphon chamber and making sure the holes in the filter holder are centered. You can also look sideways and make sure the filter holder is level. You can move it around by holding on the middle pole of the filter holder. Do this before wetting the filter completely to avoid damaging the paper filter when you are installing it in the brew chamber. Run some tap water on the filter to make sure it’s free of paper taste. At this point I recommend putting the upper chamber upside down on your counter until you use it – Don’t use the plastic lid as a stand for now, to ensure the lid is still upside down and entirely clear when you put it on top of the upper brew chamber later on.

Now determine how much coffee you want to make, as well as your brew ratio. In his Everything but Espresso book, Scott Rao recommends making a batch of coffee that takes up at least 2/3 of your siphon capacity to get a good vacuum during drawdown, and I tend to follow this recommendation. With this method I recommend starting with a ratio 1:17 and go up from there next time (e.g. 1:18) if you find that your brew was too strong. This may be needed for very well developed roasts, which are more easily soluble, or with an extremely well-aligned grinder. For example, you might decide to go with 400g of water and 23.5g of coffee, for a 1:17 ratio. I’ll use these numbers from now on. If your batch is too strong, you can always add some hot brew water to your beverage to lower down the concentration, and it should still taste good. The other way around is not fun, because there is no easy way to increase the concentration of your beverage.
You might notice that you prefer higher concentrations when you brew at very high extraction yields – this seems to be the case for me. I used to prefer TDS concentrations of about 1.3% when I brewed V60s at 19-20% extraction yields, and moved to preferring brews at 1.4% to 1.45% TDS with V60s at 20-22% extraction yields. Now, these siphon brews that get me extraction yields around 24% seem to be more enjoyable at a concentration around 1.5% TDS. Maybe it’s just me 😛
Brewing the Coffee
Boil some of your brew water in a kettle. Empty the warm tap water form the bottom chamber of the siphon, place it on your brew scale and tare, then pour 400g of hot water in it. If you happen to have 1mL glass pipettes, I find it easier and faster to go just a tad over 400g and adjust by removing water with the glass pipette. Place the lower chamber on the heat source and turn the heat up to its maximum level; here I’ll assume you are using a beam heater; I’m not familiar with the butane heater so I’ll let you decide on the exact heat level if that’s your case. You can now preheat the upper chamber a bit by pouring warm tap water on it. This is not required but it will shorten the preheat time.
Place the temperature probe in the bottom chamber, turn on the thermometer and gently put the upper chamber on top without sealing it on. This will allow you to heat up the water for a bit without having it immediately climb up the upper chamber. When the temperature reaches 210℉ or more, remove the temperature probe and place the upper chamber on top to seal it on. Do not press down too much because this could cause the lower chamber to fall down from the stand in which case I wish you luck. Make sure your upper chamber is level; I find it easier to tell when looking at the rubber joint.
It is important not to leave the lower chamber heating up without having anything in contact with the water, whether it is the temperature probe or the tube of the upper chamber. Otherwise, the water could get superheated and “explode” everywhere when you put the upper chamber on. This is caused by the very smooth surface of the siphon – water can go slightly above boiling point without actually boiling if it’s not perturbed in any way and does not have access to a nucleation site (see this Wikipedia article if you want to know more).
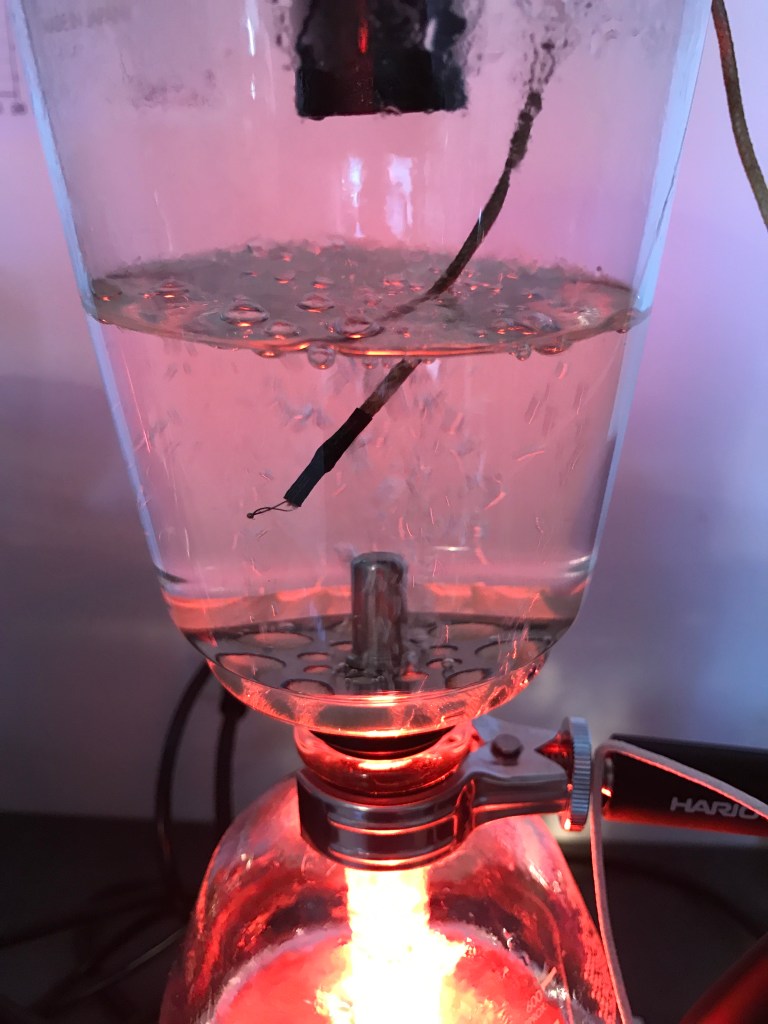
Once you sealed the upper chamber, place the temperature probe inside the upper chamber and close it with the plastic lid to get better heat retention. You can now turn the temperature reader on. Now you’ll need to wait for a good 6-8 minutes for the upper chamber to reach 202℉ (94℃) – this will allow you to actually brew at approximately 198℉ (92℃). If just used your siphon, it will be a bit faster; otherwise I find that the temperature stagnates at around ~185℉ (85℃) for a little while as the siphon’s upper chamber glass is sucking up heat and warming up. Take this time to meditate on the idea that the self is an illusion. Also make sure that the brew water is perfectly transparent in the upper chamber, otherwise it means that something was not cleaned up properly and your brew will probably taste like dirt.
You can also use this time to weigh your dose of coffee, set up your grinder and grind the coffee. If you single dose, start the motor before you put the coffee in so that you will be grinding at a uniform motor rotation rate. Single dosing is often recommended against because pop-corning beans get ground coarser than those pushed through the burrs, but in my experience this affects such a small fraction of the dose that it virtually does not affect the particle size distribution (this will be a future blog post).
Make sure your small coffee container is perfectly dry, otherwise ground coffee might stick in it and this will be very annoying. Weigh the exact dose of ground coffee in the container. You can wait a bit to grind if you are afraid that the coffee loses freshness, but I was unable to taste a difference even when I ground right when I turned the beam heater on. Just put something on top of your ground coffee container to limit contact with air. I like to put the grounds in a container smaller than the width of the upper siphon chamber to help pouring it more quickly and precisely later on. Just make sure you use a clean container. I also like to use a tea spoon to transfer ground coffee from my Forté’s bin to the container to avoid spilling coffee.
When the temperature reaches 202℉ (94℃), it is time to start brewing. If you missed this window, turn off the heat (leave the plastic lid on to avoid evaporation) and wait for the temperature to go back to about 195℉ (91℃) then turn the heat back on. If you see temperature going up so fast that you will probably miss the window, it’s ok to turn down the heat to approximately 1/3 of the maximum while you finish your preparatives, and then turn it back on to maximum heat. This will cause the temperature to go up much more slowly, without losing enough pressure for the water to fall back in the bottom chamber.
Once you reached 202℉ (94℃), lower down heat to approximately 2/3 of the maximum (on my Hario beam heater this is at the logo with two flames), and immediately remove the lid. Remove the temperature probe now if you don’t want to have to clean it up. Start your timer and quickly put the coffee in the upper chamber. To minimize spilling, place your coffee container centered straight above the siphon, turn it upside down and gently tap it with your other hand (this takes me approximately 4 seconds). Make sure that no grounds are stuck in the container, it’s worth tapping a bit more vigorously if they stick. Use the bamboo paddle to vigorously stir in up-down and left-right linear motions to create a lot of turbulence and maximize extraction, until the timer hits 0:15. This is a good time to hum some Fleshgod Apocalypse.
I find that holding the bamboo paddle straight vertically and moving your arm in a back and forth motion, rather than keeping your hand in the middle and paddling with your wrist, will minimize splatter on the glass walls. This should allow you to quickly break down any clump of dry coffee. If some grounds stick to the glass walls, try to quickly drag them back in. End the initial stirring phase with a very short and vigorous rotation motion (e.g. 1 turn) when the timer hits 0:15.
I also tried using a kitchen whisk instead of a bamboo paddle, but I was not satisfied with the results. The width of the paddle makes it easier to induce a strong flow in the slurry, which creates a lot of turbulence – I trust turbulence more than the many branches of a whisk to break down clumps of dry coffee.
I don’t think you need to be too obsessed about the repeatability of your stir, because this recipe aims to quickly reach very high extraction yields, which also quickly saturates the concentration of the slurry. As a result, extraction will become very slow after the first few seconds of immersion, so differences in how much you stir will only marginally affect your final extraction, as long as you break all clumps of dry coffee. Mitch and I were able to produce subsequent brews at the same concentration (down to 0.01%) with this method, when we used the same coffee beans.
When the timer hits 0:35 (yes, just 20 seconds later), turn off the heater and very carefully remove the siphon from the beam heater and put it on the counter. You don’t want to impart any acceleration that could agitate the coffee bed. You can make the drawdown phase faster by wetting a rag with cold water and immediately wrapping it around the bottom siphon chamber (I recommend wetting it during the 20 seconds wait and already have it in your hand). This is especially useful if you are brewing smaller batches. If you do this, you will need to remove the rag as soon as it feels hot because at that point it’s working against you by insulating the siphon chamber from cooler ambient air. Whether you decided to use a cold rag or not, immediately start inducing a slightly vigorous rotation motion in the slurry with the bamboo paddle. I do something like 5 full rotations in about 3 seconds total. Don’t put the paddle too deep because you don’t want to agitate the coffee bed that started depositing at the bottom; I put it about half the slurry deep. Note your total brew time when the beverage in the lower chamber starts bubbling heavily. Try to have a total brew time shorter than 3:00.
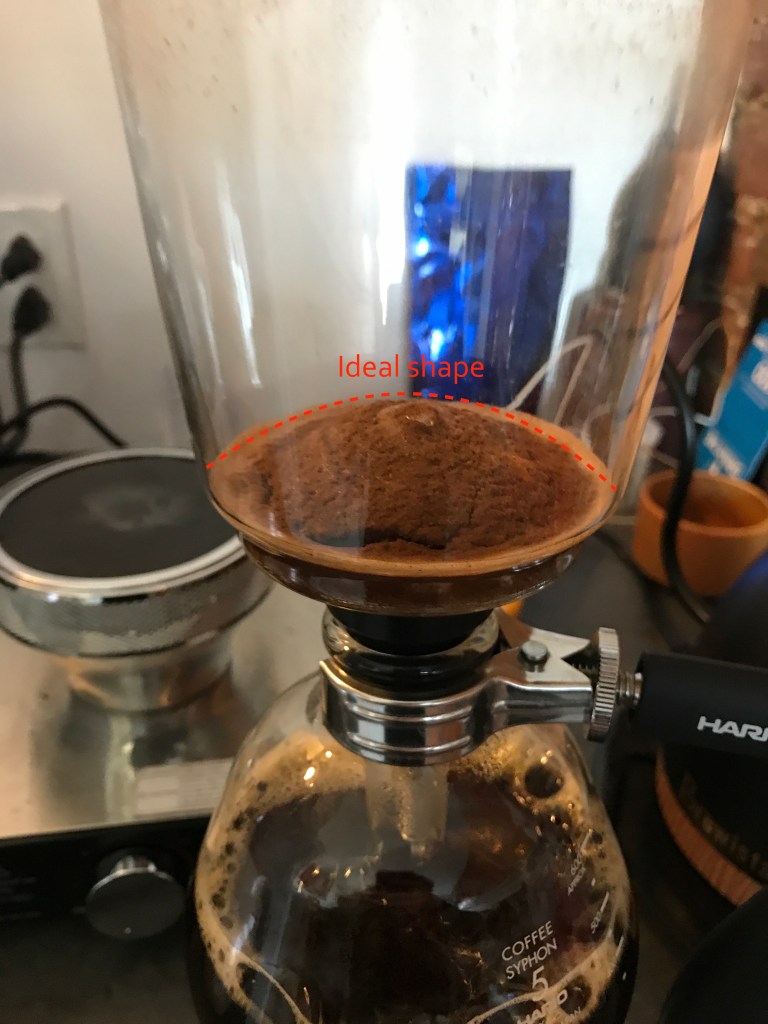
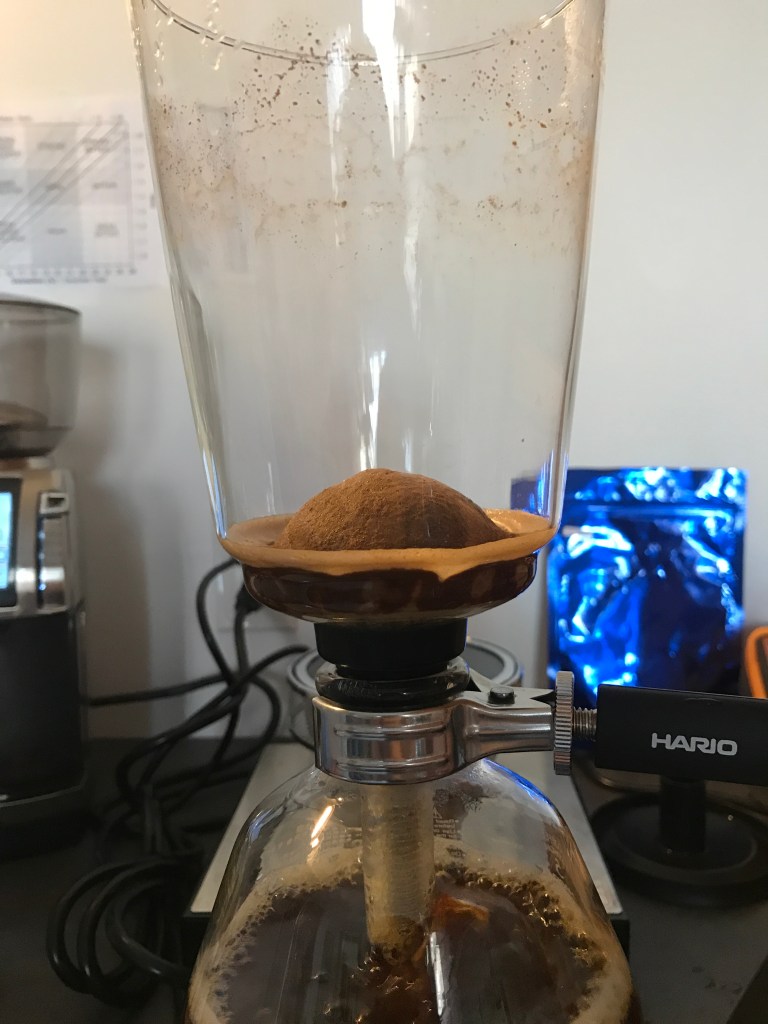
Scott Rao recommends that the shape of the coffee bed should resemble a slight parabola at the end of the drawdown, which goes slightly above the central pole of the filter holder. The reason for this is to avoid channeling and ensure an even extraction. This recipe allows to reach very high extraction yields during the immersion phase (before drawdown), so I think that this requirement a bit is less critical. I tried measuring the concentration of the upper chamber (with syringe filters and the VST refractometer) immediately before drawdown and I obtained exactly the same concentration as the final beverage, down to a precision of 0.01%. Extreme levels of channeling could lead to the paper filter breaking or fines passing around the filter holder in the beverage, but in my experience this did not happen even when the coffee bed was flat.
Scott convinced me that I should still care about channeling despite these considerations, and after a bit of experimentation I did produce some relatively astringent brews when channeling was significant, so I still recommend that you care about it too. Keep in mind that it is much harder to obtain a nice dome-shaped coffee bed with an extremely fine grind, in part because the drawdown phase takes more time, but I also suspect that the bed crumbles more easily. If your coffee bed is too flat, it means you didn’t cause rotate the slurry enough with the paddle, or you rotated it too early before drawdown. If the the center of the coffee bed is too high and is shaped like a dome, it means that you rotated too much.
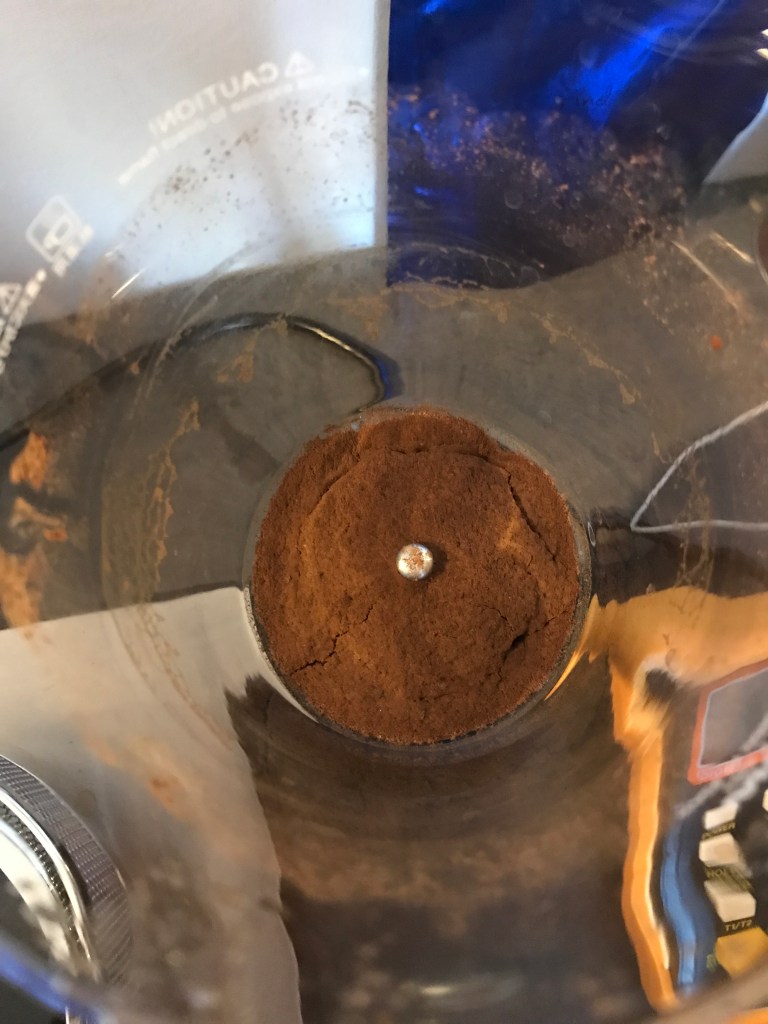
Once the drawdown phase is over, carefully remove the upper chamber (it will be hot), and place it upright in the siphon plastic lid, which also serves as a stand for the upper chamber. Once the foam around the coffee bed disappears, look at it from above; a non uniform color would indicate an uneven extraction due to channeling. The coffee bed will often crack, this is normal with such a fine grind.
Brews produced with the siphon are initially much hotter than most other brew methods. It will be hard to taste all the subtleties of the coffee when it is still very hot, and while it looks, the bottom chamber of the siphon won’t allow the coffee to cool down very quickly. For this reason, I like to pour the coffee out into a different vessel. You will automatically lose around 10℉ (5℃) when pouring out the coffee this way. If you have the Melodrip, you can pour your coffee through it to get it to an enjoyable temperature faster. James Hoffmann suggests to do this promptly, because the very high temperature may actually degrade the coffee flavors after a while. I never tried blind tasting to confirm this, but I follow the recommendation because it’s an easy thing to do and I prefer drinking coffee when it’s a bit cooler anyway.
More Beverage Clarity
I found that sometimes, these siphon brews left a small bit of coffee oil in the beverage, which probably passed through the edges of the filter mechanism. This is a small amount that is not always obvious to taste, but I found that filtering the siphon brew again with a pre-rinsed V60 paper filter will remove any potential oil left in there, so I recommend it if you are not low on paper filters.
To do this, simply put a V60 paper filter in any type of V60, pre-rinse it and pour the siphon beverage through it. I try to pour it uniformly across the walls of the V60 paper to use as much paper surface as I can, and absorb as much oil as possible. This is one rare occurrence where you don’t need to care about what material the V60 is made of, because it’s not actually a bad thing to cool down the beverage a bit more.
If you want to measure your beverage weight to get a more accurate measurement of your average extraction yield (see below for more details), this is a great moment to do it. Simply place your vessel and V60 on your brew scale, tare it, and pour the coffee. Just make sure you note the weight measurement before removing the V60, because you tared the scale with the V60 on.
Summary of the Brew Steps
Here is a short summary of the recipe detailed above. Here, I will assume that you are using the 5-cup sized siphon to brew an approximately 400g beverage and that you are brewing with a 1:17 ratio.
- Boil more than 400g of brew water with a kettle.
- Mount the paper filter on the filter holder.
- Install the filter holder in the upper siphon chamber.
- Make sure the paper filter is centered.
- Rinse the paper filter with tap water.
- Place the lower siphon chamber on your brew scale and tare.
- Pour 400g hot water in the lower siphon chamber.
- Place the lower siphon chamber on the beam heater and turn it on at maximum heat.
- Immediately place the upper chamber on to seal it. Don’t press down too hard. Make sure it’s level.
- Place the thermometer probe in the upper chamber and turn the thermometer on.
- Make sure the plastic lead is dry and clean and place it on the upper chamber.
- Weight about 25g of beans (or 23.5g plus whatever your grinder retains).
- Grind the beans, weigh a dose of exactly 23.5g, and cover the grounds.
- Wait for the temperature to reach 202℉ (94℃).
- Lower the heat source temperature to 2/3 of the maximum.
- Remove the plastic lid and temperature probe.
- Start the timer and put in the coffee dose.
- Stir vigorously in linear motions until 0:15 then make one vigorous rotation.
- Wait 20 seconds. Prepare a rag wetted with cold water and keep it in your hand.
- At 0:35, turn off the heat source.
- Immediately and gently remove the siphon from the beam heater.
- Place the cold wet rag around the lower siphon chamber.
- Immediately impart a slightly vigorous rotation (5 turns in 3 seconds) while placing the paddle approximately half as deep as the slurry.
- At any point where the rag becomes hot, remove it.
- Note the drawdown time when the beverage starts bubbling. Aim for less than 3 minutes.
- Inspect the shape and color of the coffee bed.
- Facultative: pre-rinse a V60 paper filter and filter the beverage through it.
- Facultative: use the Melodrip if you want to cool down your brew faster.

Clean up and Maintenance of the Siphon
Cleaning up the siphon takes a bit more time than other brew methods. I suggest first unhooking the filter holder while the upper chamber is upright, then place yourself above the sink, reach for the central pole of the filter holder with your other arm and gently lean the chamber on its side until it is upside down. Make sure you are holding the filter holder while you do this, and carefully remove it. Be careful as the coffee may still be hot. The filter holder and coffee bed are a bit heavy, and this will avoid damaging the glass walls of the siphon chamber. Rinse the filter holder and throw the paper filter in the thrash. Rinse both siphon chambers, the bamboo paddle and the plastic lid thoroughly, and leave them to dry. It’s good to wipe your beam heater clean too.
From time to time, I recommend cleaning up the glass parts (both chambers) of the siphon with a single drop of soap and a wet cloth. Make sure you rinse the soap thoroughly. You will need a bottle brush to clean up the inside of the lower chamber.
More rarely, or if you need a very thorough clean up of your siphon, you can put a solution of OxiClean (up to Line 1 of the provided spoon) in 500g of water in the lower chamber, and heat it up with the upper chamber attached and sealed. Do not put the bamboo paddle or filter holder in when you do this. Wait for a few minutes, then throw away the water and rinse all parts very thoroughly.
Calculating the Extraction Yield of your Beverage
The typical immersion equation (concentration times water-to-dose ratio) will not give you accurate results at all when calculating the extraction yield of a siphon beverage, and will tend to over-state your extraction yield by as much as ~2%. For more details about this, I recommend reading my blog post about how to calculate extraction yield for different brew methods.
The siphon method is special because the pressure differential during drawdown sucks out most of the interstitial water from the spent coffee bed. In the brews I have experimented with, the liquid retained ratio (mass of retained water divided by mass of coffee dose) was between 1.3 and 1.5, which is lower than the usual liquid retained ratio (about 2.0) for V60 brews. As a consequence, it will be more accurate to weight your beverage and simply use the percolation equation for extraction yields (detailed in my blog post on extraction). This assumes that all of the water retained in the coffee bed is absorbed in coffee cells rather than interstitial, and therefore does not participate to extraction. A slightly more precise way would be to assume that the coffee bed absorb its own weight in water (fabs = 1), that your slurry concentration is the same as your beverage concentration, and enter your beverage weight, water weight and dose in Mitch Hales’ online extraction yield calculator.
If you have a refractometer and want to verify whether coffee fines made it to your brew independent of your palate (fines would flatten the taste and leave a silky feeling on your tongue), you can use VST syringe filters and compare your concentration with or without using the syringe filters. If you followed these steps properly and have a well aligned grinder, both readings should be within 0.01% of each other. I highly recommend reading Mitch Hale’s post on how to measure extraction yields accurately.
This method allowed me to reach extraction yields up to 24.6% on a few coffees now, and I suspect I may be able to reach even higher extractions with very well developed roasts. Mitch has reached crazy extraction yields of 26% with his Turkish brews but I suspect this has more to do with his EG-1 grinder producing less “boulders” (the term is very relative here).
I tried this method on about 8 different coffee beans now, with really great results. Contrary to my expectations, I brewed an amazing Gesha Village that retained a lot of its floral and honey notes, and made great Kenyans and Ethiopians too. I did however try one particularly under-developed roast and it tasted awful and astringent. I suspect that this brew method will be best when you use well-roasted, high-quality beans, and it’s possible it won’t play well with some types of coffee. As Mitch put it, “you should use this when you actually want to extract everything from the beans”.
Cloth Filters

For a reason that escapes me, siphons are traditionally sold with cloth filters. I have found that brews I made with cloth filters tasted less good than those I made with paper filters, even if I used a brand new clean and well-rinsed cloth filter, and post-filtered the brew with a V60 paper filter. However, the worst part about cloth filters is the rancid taste that they very quickly develop, even after just one brew.
If you insist on using them, here are some recommendations for you. When you install them on the filter holder, always do a simple loop knot, not a double one, otherwise you will hate yourself later on. Also buy a bunch of them, at least 10. After every brew, immediately clean up the top chamber of the siphon – leaving the coffee bed on will stain the filter more. Clean up as much of the coffee as you can by running tap water in the upper siphon chamber before you remove the filter holder, otherwise coffee fines could get stuck in the string seams of the filter.
Immediately wash the filter thoroughly under hot tap water and rub it gently with the palm of your hand until it looks white. Twist out as much water out as you can, and immediately store it in a sealed plastic container with something that absorbs humidity (raw rice would work). Place the plastic container in the freezer. You can keep a single plastic container filled with rice with all of your dirty cloth filters.
The only way I found to get the rancid taste off from cloth filters is to boil them with unscented, dye-free OxiClean (yellow label) after every brew. This is why I suggest doing this in batches once you accumulated at least a couple dirty filters. Once you have accumulated enough dirty filters, take the plastic container out of the freezer and let it thaw for the rice to separate from the cloth. Shake down the filters and throw away and replace the rice in your plastic container. Boil all filters in a solution of OxiClean and water (follow the package recommendations for the dose; fill spoon to line 1 per approx. 500 mL water) in a large pot. I recommend putting a lid on the pot and turning on your stovetop fan to the maximum, because this stuff stinks.
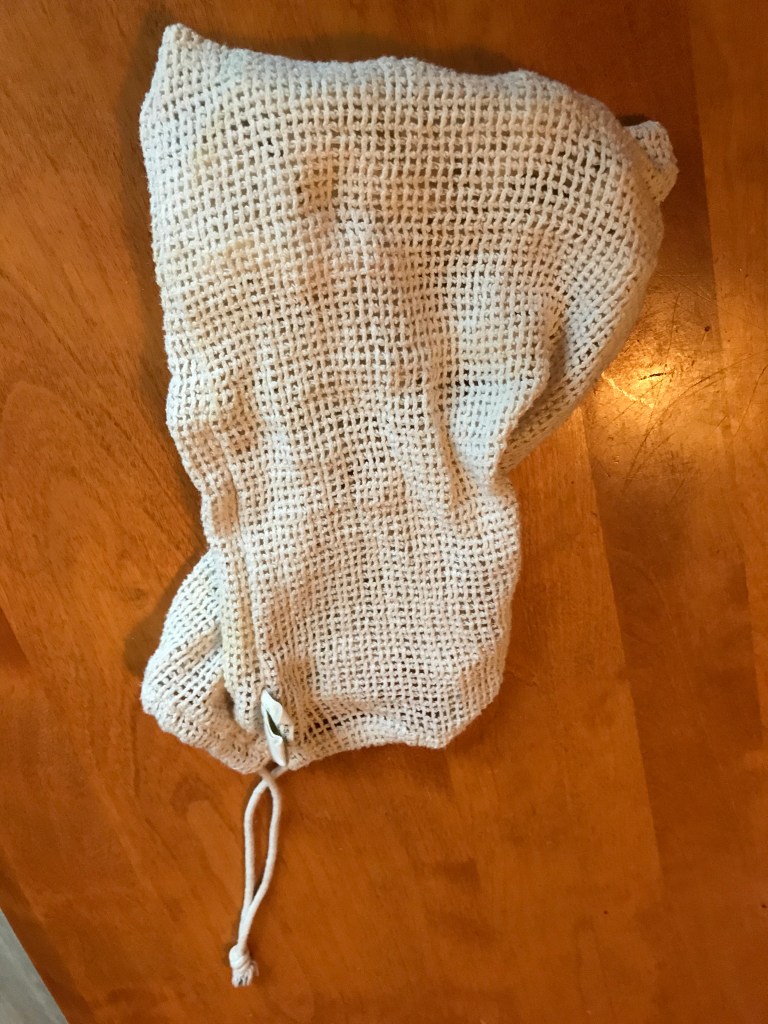
Boil the filters for about 15 minutes, or until all filters look white, stirring occasionally. Throw away the dirty water, and rinse the filters with cold water. If they do not look perfectly white, do another OxiClean boil and rinse them again. Put them back in the pot with clean water and boil them again for 15 minutes, stirring occasionally. Do this again if they still smell like OxiClean; using a larger pot with more water will make this more efficient. When they don’t smell bad anymore, place them in a strainer and rinse them with cold water for a minute or so. Twist the water out of each filter and place them back in your plastic rice container in the freezer. If you don’t want to wait until you have no filters left before cleaning them, you can use two plastic containers, one for dirty filters and one for clean ones. Another option is to dry your freshly cleaned cloth filters in the tumbler. I tried placing the filters in a meshed cloth bag, similar to what you would use to buy fruits at the grocery store.
Welcome to Hell.
Some Acknowledgements
I would like to thank Mitch Hale for useful discussions and Dan Eils, who re-invigorated my interest in fine grind vacuum brews by generously sending me his Vac60 prototype. Thanks to Scott Rao for providing a lot of help to minimize channeling with this method. Thanks to Victor Malherbe for suggesting the use of a lens blower to clean up coffee grounds. I’d also like to thank Matt Perger and Barista Hustle for sharing a considerable amount of their knowledge about coffee extraction in general. Without this knowledge, I would not have cared about grinding finer in the first place.

Do you think a longer steep time(maybe over 1 min) in this recipe could get higher extraction yield?
LikeLike
I have not tried, thinking it could also lead to astringency but that could be wrong.
LikeLike
Ah, siphons. I remember struggling to achieve a decent bed shape when preparing them at Le Couteau. I’d be very curious to try some coffee brewed with your method! It seems like a lot of trouble but hopefully the taste makes it worth it.
LikeLike
Haha yes, it’s a lot more trouble than a V60, but if you choose the right coffee it’s worth it 🙂
LikeLike
Really helpful, I’ve ordered a pack of paper filter when I’m reading this page.
Now, I’m waiting for your Aeropress brewing methods article.
LikeLike
Nice ! For an aeropress recipe I’ll need to play a lot more with it. I’m hoping to get a recipe out at some point when I’m satisfied with one.
LikeLike
maybe you need this: https://www.youtube.com/watch?v=SHdXC_88_2g
LikeLike
By the way ,the fleshgod apocalypse video is hilarious, love it!
LikeLike
Ok. I tried it for the first time yesterday, and it was both the best siphon coffee I ever did/had, and in a way not as satisfying, probably because of the ratio … i am used to be way closer to 1/10 with my siphon coffee, so this one felt kinda weak, but extremely clean (the filtration through the bed of grounds is Grrrreat!) and nice tasting. I will try to go stronger next time … and maybe even finer 😉 thank you very much for sharing this approach to vacuum pot.
LikeLike
I typically use a 1:17 ratio and get ~1.45-1.55% TDS with this method, which is quite strong by filter standards. Hope this helps.
LikeLike
I just sip my todays brew, i went for 1:15, and have put the burner away at 40s … and its almost perfect now .) It felt a bit “diluted” yesterday, though the taste itsefl was great. Sadly I domt have refractometer yet (though I know I will have to buy one :)) so I cant measure tds now. But I do my pour overs at 1:15, and I am used for imersion style brews to be a little stronger then the pour over… usually doing immersion at 1:12 (not siphon though … not sure about my ratio I used there, i did not use siphon for a long time as I did not like it filtered the coffee – which is now solved with your method perfectly).
LikeLike
I have to add – after it cooled down I realized I did get it to be stronger, but I also lost some fruitiness, so probablyadding the 5s was not a good idea .. I also switched from commandante to hiku, so maybe I did have even finer grind settings … So not as near perfect as I though but your method made me love my vac pot again and I think in a few iterations I will be able to get the right strength and taste profile. What I really love is how clean it is and that its not as much steps as it seems … 🙂
in fact when I heat the lower vessel to full boil, and add the top piece, when the water is move all up its usually 94 or even a bit more … so no waiting no fussing around, its just a matter to not go above that 94C and I can move on.
What is kind of funny and strange, is that I get a lot of fine bubbling and foaming when 2/3rds of the volume are still in the upper vessel … not sure where it comes from … if the water boils in the low pressure, or if some gasses are sucked out of the bed of coffee … but there should be no accessible air at that point. But it gets all filtered down in the end, it just looked strange the first time I saw it.
LikeLike
I think bubbles can happen when you have air being sucked in through the bed of coffee and the filter. Make sure your bed shape is as described in the blog post, because otherwise you may have channeling, which can potentially cause uneven extraction and astringency even in this case where our water is very concentrated during the percolation phase. Air bubbles may happen even if you have the correct bed shape, but I think they will be worse if you spun too much and your bed shape is a tall dome that indicates channeling.
LikeLike
I tried this with a coffee which had much acidity and it wasn’t the best Syphon I made yet. I also had coffees which worked very well with the cloth filter and medium-fine grind (20 clicks on Comandante C40 Nitroblade).
I’ll try it again with coffees which have less acidity and more natural sweetness.
Did you noticed if this method works better with some coffees than others? (light vs dark roast, washed vs natural)
You also inspired me to come up with a Syphon recipe. In my case I add Ice into the upper chamber after approx 1:00-1:30 min blooming time to cool down the drink and slow down the extraction. It also seems to speed up the drawdown phase a little bit. If you’d add hot water to the upper chamber you might receive a longer drawdown phase. But I try to finish the extraction at 2:15-3:00.
LikeLike
It is super important to choose the right coffee with this recipe, but it’s not really about acidity or sweetness. It needs to be a very well developed roast; typically those are coffees that yield very high TDS concentrations in a V60 and have no astringency. Find a Kenyan that extracts very high and does not taste like tomato and that should be a good one to start with.
LikeLike
Excellent info on all your posts, so thank you !
First, I’m a bit surprised at leaving the heat on for 35 seconds total, if I understand correctly. Normally I am a 60 second guy, or sometimes more, and have seen people who swear by 90seconds. Also I have tried the “American” add the coffee after the boil, and the “Japanese” add the coffee to the upper chamber before inserting, and I happen to like the cleaner and smoother taste of the Japanese method; Thoughts Pls ! But your research into to all this mojo, leads me to want your opinion. So I would like your thoughts as to the outcome of extended heating times with the Syphon, as that is the newest acquisition of 40 years of coffee geekery.
Also after reading so many theories on filters, I bought a ceramic syphon filter I found on Amazon and I love it !!! Quick scrub and dry, done !
Thanks in advance for your advice
LikeLike
Oh great about the ceramic filter ! I suppose it produces a cup with more body right ? I wrote this a while ago so forgive me if I don’t understand your question; the delay for heating was actually based on my putting a K-type thermoprobe in the upper chamber’s water to determine when it has stabilized. It could depend on your exact set-up, but for me leaving it longer would not have changed much except for having more water evaporating.
LikeLike
In your Turkish Syphon post you mentioned taking the heat completely away after 35 seconds total after adding coffee. I guess that seems brief to me.
Also, I took your advice on the finer grind and yep thanks for that.
My switch to the ceramic filter was based on so many thoughts and methods and extra work of using cloth and paper filters. I don’t really notice any difference in taste. Just
efficiency !
Also I may get a lot of heat about being a Robusta fan, but having lived in Italy and loving strong espresso, Then tasting a lot of Robusta in Vietnam, including “Weasel Poop Coffee”, Robusta and maybe sometimes a Robusta/Arabica blend are my beans of choice.
I think the 100% Arabica thing is a marketing ploy to sell more expensive coffee !
Thanks
LikeLike
Ah I understand now ! Well, I think you can play with the extraction time yes. With a Turkish grind I suspect you won’t see a huge difference.
LikeLike
Finally tried your 15/20 timing method, and it was surprisingly good, so thanks ! Was dubious, as I had been trying different brew times 75 sec/90 sec etc with a coarser grind. But followed your method exactly and boom !
Tomorrow I’ll try using the same method but using the Japanese: add the coffee before the boil.
FYI I have been using the ceramic filter from Amazon for months now and am very happy with ease of use. Because of the tightly woven metal mesh filter,(no fines) the trick is to take it apart once a month and leave in a small bowl of vinegar overnight, to dissolve the coffee oils in the mesh. I had been doing a quick scrub very day, but noticed the flow thru was slowing, and the vinegar cleaning solved that immediately.
LikeLike