
OK, this will seem sudden to almost everyone, and even more so to readers on my regular blog, but I decided to break out the chronology of my next couple posts to talk to you about something that excites me a lot. And from that break in chronology comes an announcement that I would normally have made in an earlier post: I am now the happy owner of a DE1 Decent espresso machine, thanks to my Patreon followers who amazingly already backed me up to this level of coffee geekery equipment. I never expected this to happen this fast. I received the machine just a bit more than a month ago, and it introduced significant chaos into my coffee habits, thoughts and plans. Positive chaos, however. For those who do not know, this machine might be better described as a computer filled with sensors that drives hot water through your coffee. It a weird, and delightful concept. If even an espresso machine was suited to me and my almost unhealthy level of coffee analysis, this is the one.
In just a month of having used the DE1, I think my understanding of percolation has solidified a lot. I am still creeping out of novice territory in terms of the mechanics of actually preparing espresso and tasting it, but this thing is almost live having X-ray vision into the portafilter if you think hard about the graphs it shows you and have the right tools to interpret them (and the obsession to dream about these graphs). One of the frustrations I encountered, however, relates to preparing espresso in general: the amount of coffee that needs to be wasted while adjusting grind size, dose, and perfecting puck preparation techniques can be significant before we obtain a great-tasting, “dialled-in” shot.
This is particularly true when using the DE1 machine in flow mode, i.e., where the user decides on the desired flow rate (or, more generally, a flow profile) instead of a pressure profile. In principle, a flow mode is great because it can prevent runaway effects where the flow becomes too fast near the end of a shot, by instead automatically adapting the pressure profile of the machine to keep a flow of water that is constant in time. It can also reduce the impacts of channels where too much water takes the same path of the coffee puck, by reducing the pump pressure when this happens.


In practice, however, it is harder to dial in a shot when using a flow profile. This is true because the pressure can react very strongly to small changes in coffee bed resistance (i.e., grind size, puck prep, and other factors) when the machine requires a fixed flow rate. Just to clear out any misconception, the flow rate I am talking about here is actually the volume of water per second that the machine is sending into the coffee puck. At equilibrium (after the coffee puck saturates completely), this will be the same as the drip rate out of the coffee puck because water cannot be compressed at 9 bar (very far from it). Bear in mind this is not exactly the same as the microscopic velocity of water around coffee particles.
It might seem surprising that pressure reacts so strongly to changes in bed resistance if you are familiar with Darcy’s law, which dictates that the drip rate of a fluid depends on the pressure drop across a percolation medium, in a linear way, which means that if you double the pressure, the drip rate should also double. However, Darcy’s law make numerous approximations in order to come to this conclusion, and one of them completely fails in the context of espresso making: Darcy’s law assumes that the medium of percolation is fixed, and immovable. This is wrong in many ways when we pull an espresso shot. As you increase the pressure, the puck compresses and becomes shallower (this, taken alone, would increase the drip rate), and some coffee powder gets detached and moves around through the coffee bed (the drip rate would increase when fines are liberated, then decrease if they get captured further down in the coffee bed or a paper filter). But even more importantly in this situation, the coffee particles getting compacted closer together means that the sizes of pores between the coffee particles become smaller. In technical terms, the porosity of the coffee bed becomes smaller, and this reduces the drip rate.
Looking at the classical form of Darcy’s law can be insightful for this:

In the equation above, Q is the drip rate, L is the thickness of the coffee bed, A is the cross-sectional are of the coffee puck, μ is the viscosity of the slurry, k is the intrinsic permeability of the coffee bed (how easily it lets fluids through, i.e. the reverse of resistance), a property that depends on particle sizes, shapes, roughness, and pore sizes, and Δp is the pressure differential across the puck that is applied by the espresso machine. The considerations that I mentioned earlier mean that both L and k are in reality functions of the pressure drop, and k is even a function of time while fines are still moving around. The exact ways in which L and k depend on pressure are relatively complex and not too important here, but in practice, the Decent users community has noticed that the combined effect of all these phenomena is a drip rate that depends roughly on the square root of the pressure drop:
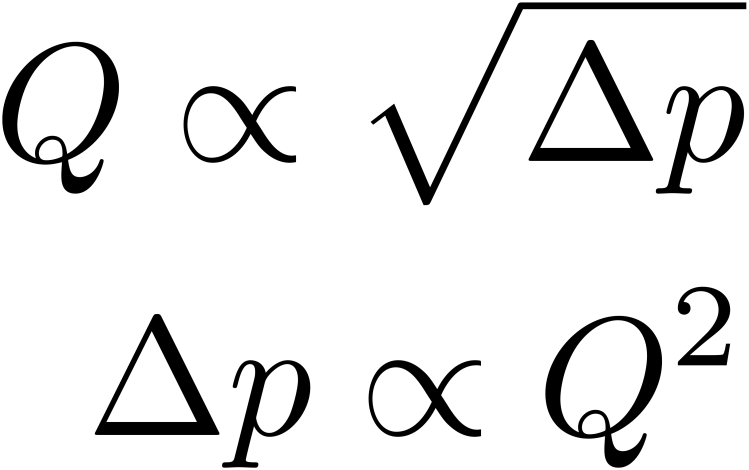
This seems to hold as long as the pressure does not go above 10 bar, where the drip rate becomes extremely small even at high pressures. John Buckman at Decent calls this a “secondary puck compression”, which may be caused by the cellulose of coffee particles deforming and blocking any remaining pores much more efficiently. We try to avoid going above 10 bar because of this reason; it makes it very hard to manage the flow rate efficiently when it happens, and the pressure tends to peak very high and the espresso shots stall completely. If you play a bit more with Darcy’s law and split out the coffee bed’s permeability k into its grind size and porosity components, you would end up with the pressure drop Δp going with the squared power of the parts of the puck’s resistance that have to do with grind size.
I know it is popular to suggest using the Darcy-Weisbach equation whenever the assumptions of Darcy’s law fail, but Darcy-Weisbach is a slightly more general equation that accounts for friction in turbulent fluids, and rule-of-thumb calculations as well as computer simulations by Ellero & Navarini (2019; for those well versed in hydrodynamics, the microscopic Reynolds number associated with water flowing inside the coffee puck is in the range 2—12, far from the thousands required for turbulent flow) indicate that the flow of water inside a typical espresso coffee puck never comes any close to the velocities required for turbulence. Hence, Darcy-Weisbach is of no help in espresso making, perhaps unless a gigantic channel happens that would leave a visible, large hole in the spent puck.
Pardon me for this relatively technical detour—all this was mostly useful to point out that the pressure curve of the DE1 set in “flow mode” will react to the square of any change in puck resistance to keep the drip rate fixed. In other words, a coffee bed twice as more resistant will require 4 times as much pressure. As you can imagine, this volatility in the pressure curve makes it hard to obtain “standard” espresso shots at about 9 bar, and especially in avoiding a pressure that goes to 10 bar and up.
As a consequence of this, several DE1 users usually adopt a more easily approachable pressure profile when they pull espresso shots. One very popular pressure-based profile is to ramp up to about 8—9 bar right after preinfusion, and then let the pressure fall down gently as the resistance of the coffee puck gradually reduces. This reduction in puck resistance is pretty much universal, although not all coffee pucks change at the same speed. I’ll come back to this in a future post, but I believe this is mostly caused by fines getting detached and reaching the cup of coffee, and probably also due in part to the viscosity of the slurry going down as solubles get depleted and also carried in the coffee cup. Thus, slowly reducing the pressure will maintain a more constant drip rate through the espresso shot, and it seems that this is generally preferred in the coffee community. I do not know why a constant flow rate may lead to better taste, and I am definitely interested to hear if some of you have hypotheses to explain it.
If you still follow me, you will notice that neither of these two types of profiles are “ideal”—flow profiles can cause volatility in the pressure curve unless they are perfectly dialed in, and pressure profiles can lead to changes in flow rate if the rate of decrease in pressure does not match the rate of decrease in puck resistance.

With all of this in mind, and after reading John Buckman’s reflections on the three (or for) “mothers” of good espresso recipes, and starting to use Rao’s Allongé profile on the DE1, I had a realization: The Rao Allongé is intended for the pressure to peak in the same range as an espresso shot (8—9 bar), with the same goal of a constant (but faster) flow rate after preinfusion that leads to a slow decrease in pressure, and a similar typical brew time around 30 seconds. The only differences are: a coarser grind, a longer ratio (more water per grams of dry coffee), and a faster flow rate. At first, this seemed a bit arbitrary to me, but then I realized that the Allongés seemed to taste noticeably better when I managed to get them to peak near 9 bar — they are built as flow profiles on the DE1, so it requires a bit of fine-tuning of the grind size too.

I can’t say I’m sure about this, but this seems to indicate something that might be fundamental about preparing coffee beverages with percolation and the use of pressure. Maybe we just want to get a flow rate that does not decrease during the extraction phase, and get the fastest flow rate that won’t enter this problematic regime where the pores of the coffee bed start closing up beyond 10 bar of pressure. I could see how a flow rate increasing during the extraction would be bad: this would cause a more potent extraction toward the end of the brew, where most of the solubles were already removed anyway, and this might be efficient at extracting the larger molecules that do not taste as good, or maybe even some cellulose that make up the walls of the coffee cells in the most extreme case. Maybe at some point in the future we may realize that decreasing drip rates near the end of the extraction are also good (or perhaps even better), but currently no one seems to be exploring this possibility, for an obvious reason: a coffee bed’s hydraulic resistance usually goes down during the extraction, so unless special care is taken, the drip rate will tend to go up, not down as this happens.
If that intuition turns out to be right, it begs another question: why would only typical espressos at 1:2 (1 part dry coffee to 2 parts water) or 1:3 ratios, and then the Rao Allongés at 1:5 to 1:6 ratios taste good? I don’t see an obvious reason to believe that there is nothing else good-tasting in between, or even on either sides of these two possibilities. Taste is obviously subjective, and the perception of taste is well known to depend a lot on concentrations, but what if those are just two recipes along a continuum of good-tasting recipes that peak near 9 bar and maintain a constant drip rate throughout the extraction?
This question led me to think about another way in which we could program the DE1 to achieve good extractions. If what really matters is peaking the pressure near 9 bar and then maintain a constant drip rate of whatever the drip rate happens to be at the moment where the pressure hits 9 bar, why not ask the machine to do just that? Apart from slight differences in preinfusion, this same profile would yield a “flow profile” espresso shot with a fine grind, and a Rao Allongé profile with an appropriately coarser grind. But then… it would also potentially yield good-tasting beverages anywhere in between, assuming that the range in beverage concentrations is also pleasing to the barista.

If this holds to be true, it would be even better than it sounds. This would not just open up new interesting beverages, but it would also mean that getting the grind size wrong would yield a good-tasting beverage anyway. Imagine you use such a profile and get the grind size grossly wrong and grind way too coarse, and end up with a good-tasting Rao Allongé. That may not be what you were trying to achieve, but if it tastes good that would already be a start! And now imagine you just get the grind size wrong by 5-10 microns in burr spacing. Instead of getting a shot that peaks at the wrong pressure, or where the drip rate craps out completely and generates a sour or bitter brew, what you would get is a slightly different beverage type, still along the “family” of good-tasting recipes, without all the extraction defects that follow an uneven or otherwise problematic percolation.
As you can probably tell, I’m excited about this possibility. I would love to stop worrying about pulling a shot with a bag of coffee I only have 100 grams of. And I would also love to waste zero grams of good-tasting coffee regardless of the bag size.
In practice, there is still one hurdle in getting the Decent to behave like this (i.e., peak at 9 bar then keep whatever drip rate at that moment constant). There is currently no way to specify a desired drip rate on what is currently being measuring during a shot. When I asked John Buckman about this possibility, he mentioned that they plan to design a whole programming language surrounding the construction of DE1 profiles, and that this would be a great application for it. I was happy to hear this, and then in the following days I kept realizing even more points about how cool such a profile might be. This made me so excited that I decided to try and find a way to bend the current Decent software into doing it anyway, even if it wouldn’t be perfect.
After a bit of fiddling, I realized that there is actually one way to achieve such a profile with the current DE1 software. This method is limited by the finite amount of steps (20) that the DE1 will accept to execute during a single shot in advanced profile mode. Any well-behaved profile should indeed fit within 20 steps, but this one does not belong to this category, because it is trying to work around the current capabilities of the machine. Here’s the idea:
- Execute a normal preinfusion. For current DE1 “flow profile” shots, this is a flow profile step at 3.5 mL/s that triggers an exit to the next step whenever the pressuredrop reaches 4 bar, indicating that the puck is saturated with water or close to it.
- Rise the pressure and hold it at 8.6 bar for 4 seconds, as one would usually do at the start of a pressure profile on the DE1.
- Now, the weird part: Attempt to start a long flow profile step at a flow too fast for typical espresso, in this case 3.5 mL/s, with a trigger that exists the step if the flow ever reaches a value slower than 3.4 mL/s.
- Follow with a very similar step that attempts to establish slightly slower, 3.3 mL/s flow profile step that triggers out if the flow reaches 3.2 mL/s.
- Keep adding steps like this until you reach step #19, with a value of flow rate that would typically be too slow for espresso — in this case, 1.0 mL/s, and that triggers a skip whenever the flow rate reaches 0.9 mL/s.
- Add a final flow profile step that is even slower, in this case 0.5 mL/s, without any trigger for skipping that last step.


It may seem like every one of these steps starting from the third one are self-contradictory, but in practice this serves a purpose. Imagine you grind a bit too fine, and instead of reaching your goal of, say, a 2.2 mL/s flow rate during the extraction phase, you actually reach 1.8 mL/s. What will happen ? Well, the machine will peak at 9 bar because you asked it to, the flow rate will reach 1.8 mL/s, and then the machine will attempt to run step number 3, and it will ask the machine to up the flow rate to 3.5 mL/s while immediately starting to check that your flow rate is at least 3.4 mL/s. This happens so fast that the pumps won’t even have any time to react and the software will have triggered out of steps 4, 5, 6 and so on until the exit condition is not triggered anymore: this will happen at whatever step has an exit trigger slightly below your current flow rate (1.8 mL/s). In practice, this will happen at whatever step is asking the machine to reach a flow rate pretty close to 1.8 mL/s, and there you have it: you effectively asked the machine to keep whatever flow rate was currently going on.
I was honestly skeptical this would work because it is so twisted, but to my delight it worked exactly as I wanted! Now, the limit of 20 steps required a careful selection of what flow rates we want to test during steps 3 to 19. I asked some long-time Decent users (thanks Scott Rao and Stéphane Ribes) and looked a bit on the Decent user forum for what ranges of flow rates people are usually pulling their shots at. This depends a bit on roast date, and on the desired ratio (as you might expect from the discussion above), but it mostly seems to happen between 2.0 and 2.7 mL/s. For this reason, I decided to scan this range with steps of 0.1 mL/s, and also scan a wider range (0.5 to 3.5 mL/s) with more spacing between the individual steps. With the more flexible coding capabilities of the future Decent software, the machine will be able to keep exactly the flow rate you had whatever its value is, but right now this will cause the machine to adopt something close, unless you are so far from dial in that your flow rate is outside of these bounds a the moment where the pressure profile peaks.
If you think the profile seems complicated, you are right that the means to get there were complicated, but in reality using the profile should not be more complicated than any other ones, and hopefully it will be simpler because it might taste good in a wider range of grind sizes. Just view it like this: the preinfusion and the initial pressure peak are fixed, and the shape of the flow profile is also fixed. All that changes is how fast the flow rate is, starting at the pressure peak. You are dialing in the fixed flow rate with your grind size. In principle, you might be able to just pull shots and stop them at about 26—30 seconds, and then if your flow rate was a bit faster than your usual goal (typically 2.2 mL/s for light roasts), grind a bit finer next time, and vice versa. Hopefully, you’ll be able to enjoy that brew even if it had a flow rate that is slightly wrong. Now, what happens if you grind WAY too coarse ? You’ll get a sudden jump to the fastest flow rate (3.5 mL/s) after the pressure peaks, accompanied by a sudden drop in pressure. In the reverse, if you went way too fine, the pressure will suddenly jump after the ~9 bar peak and flow rate may struggle to reach even the minimum 0.5 mL/s allowed by this profile. Maybe you will even reach the forsaken range above 10 bar where the shot goes to hell. But hey, what other profiles can fix shots that far from dial-in right now ?
I have only tried this on a few shots so far, and the results seem to be promising. I have only been making and tasting espresso for a bit more than a month now, so I don’t put too much trust on my espresso palate. I also wouldn’t trust my puck prep except that I received a significant amount of help from Scott Rao to the point where I think it should now be acceptable. In short, I’d now like to share this profile to see what others think about it. If there’s something wrong about the many assumptions above, then the profile will just die out.
But otherwise, maybe it will help us waste less coffee and explore more recipes, which would be lovely. I also think that, still assuming I’m not suffering from confirmation bias when tasting my shots, there might be ways in which we can improve it in the future.

Maybe a linear decrease in flow rate over the shot will taste better? Maybe current preinfusion can also be improved, as pointed out by Stéphane Ribes in one of his amazing reports available on the users-only Decent forum? Maybe we can have a version that automatically stop based on a set shot time, capturing the fact that coarser grinds seem to do better with larger ratios, weaker concentrations, and similar shot times? We’ll see!
While I was at it, I also built two more profiles that I like, both built by Scott Rao on the DE1. The blooming shot is very similar except for a long pause between the preinfusion and the extraction phase (allowing one to reach shockingly high average extraction yields), and the Rao Allongé. Yes, yes, the recipe that “might unite standard shots and Rao Allongés” has a version for either of those two, but that’s only a temporary limitation because it would be impractical to scan all the flow rates typical of espresso shots, as well as those typical of Rao Allongés (~ 4 mL/s) with the limit of 20 steps currently required by the DE1.
I’ll let you know more about what I think when I’ve tried the profiles more extensively, and I’ll also talk about how others have liked it.
You can find the three profiles I’m proposing here:
Adaptive Shot—Intended for 1:2 to 1:3 espresso
Adaptive Blooming Shot—A modified version of Scott Rao’s Blooming Shot
Adaptive Rao Allongé—Intended for 1:5 to 1:6 Rao Allongés
Please note they will probably change in the future! Also note that the profiles above are all intended to be manually stopped after about 26-40 seconds. Do not let them run in their entirety, otherwise you will get extremely long shots that will probably be weak and over-extracted.
Disclaimer: I receive no financial benefits from Decent Espresso machines, and I have no business ties to them. Decent Espresso generously offered me a 25% discount on the machine. All my impressions of the machine are therefore my own and never financially motivated (as goes with all my past posts, and all products so far).

Just set this up and pulled a shot. I was waay more delicious than I expected(note: I trust Mr Gagne a ton.) I pulled a 3 week old Guatemalan using my DE+ and an EK-43. My grind was waaaay course, and I used aeropress filters on both top and bottom of the puck as is my current standard. It was freaking delicious though. Will pull more tomorrow and report back. Excellent results so far. Bravo!
LikeLike
thanks for the article. well explained. I must say you are a true coffee lover.
LikeLike
Hi Jonathan Gagné. Very nice article and very useful. My question is that at the beginning of the article you saw the first graph and you say This shot peaked at 8 bars, which is in the range typical of a nice espresso shot but in the graph saws the peak around 11 bars have a missed something or it’s a misprint? Thanks. Keep the nice work
LikeLike
Oh thanks, I must have used the wrong shot in this figure. The caption doesn’t match the curve.
LikeLike
This was indeed a typo, thanks for pointing this out
LikeLike
Hi Jonathan. Nice article but I am a little bit confused. In the first graph you say This shot peaked at 8 bars, which is in the range typical of a nice espresso shot but in the graph saw 11 bars have I missed something and secondly the pressure and glow is puck pressure no the pump write?
LikeLike
hi, i just recieved my decent 2 days ago. (i did not dig too deep in what the software can or can not do, because it was an occasion to buy a used one…) and funny thing after the first two shots: i thought: well, this lacks a „basic“ feature….so i wnt looking for it and ended up here and am very very thankful for your work and thoughts…..
LikeLike