
Lately I received the kettle Brewcoat that I ordered a few weeks back; I previously didn’t dare order one because they don’t make any for my Brewista artisan gooseneck kettle and they’re not cheap. Thanks to your support, I decided it was worth trying it and it would provide us with a “worst case scenario” of how a loosely fitting brewcoat improves kettle temperature stability. I went with the “Black felt/Black Polar Composite” version; I picked the Bonavita 1.0L kettle model because the size is very similar to the Brewista, and I was delighted that it fits quite nicely by adding just two pins:
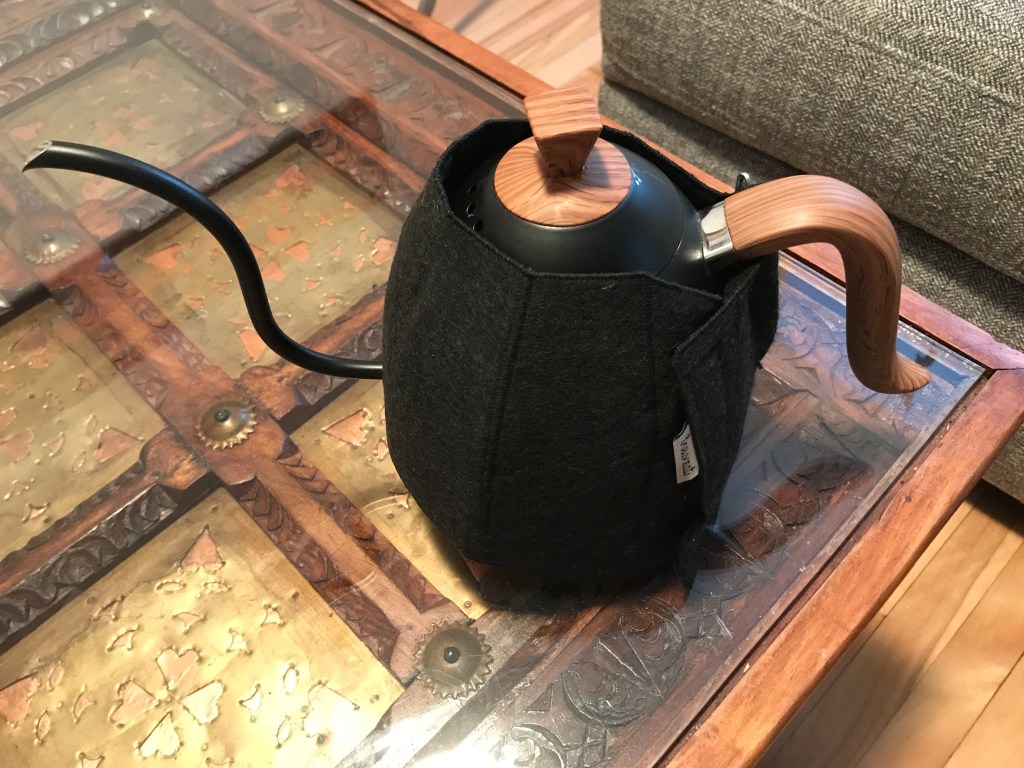
The back of the kettle is the part where the fit is worst, because the Bonavita has its handle connected to the bottom of the kettle where the Brewista doesn’t:
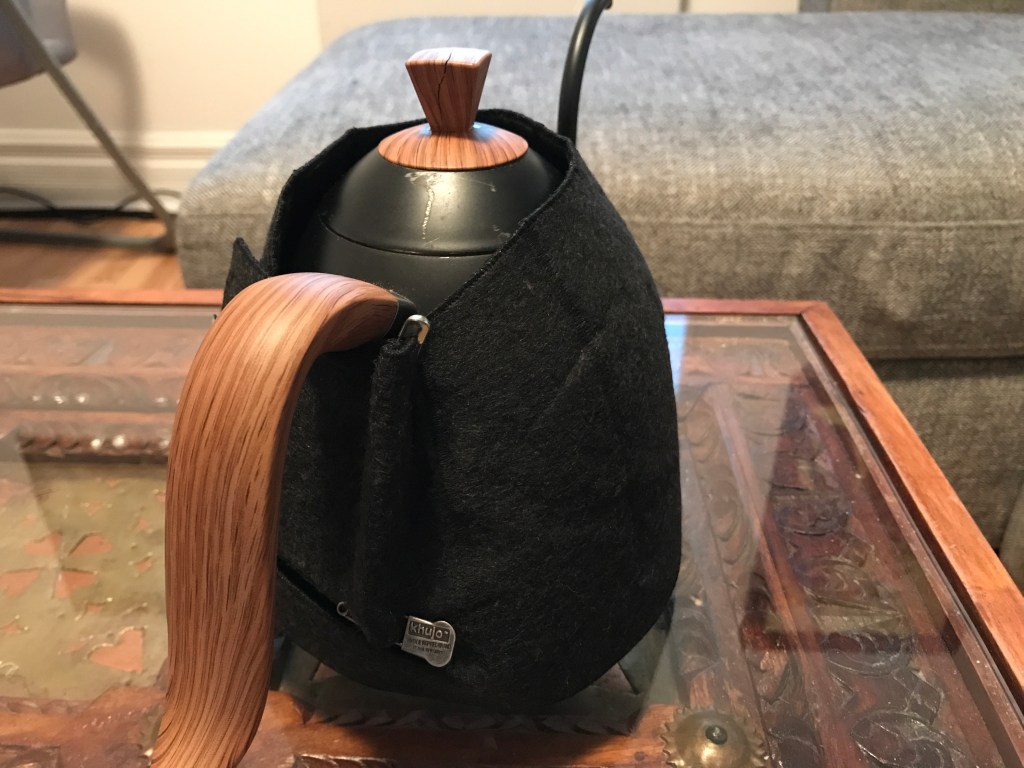
I know, I scratched my kettle a bit 😢
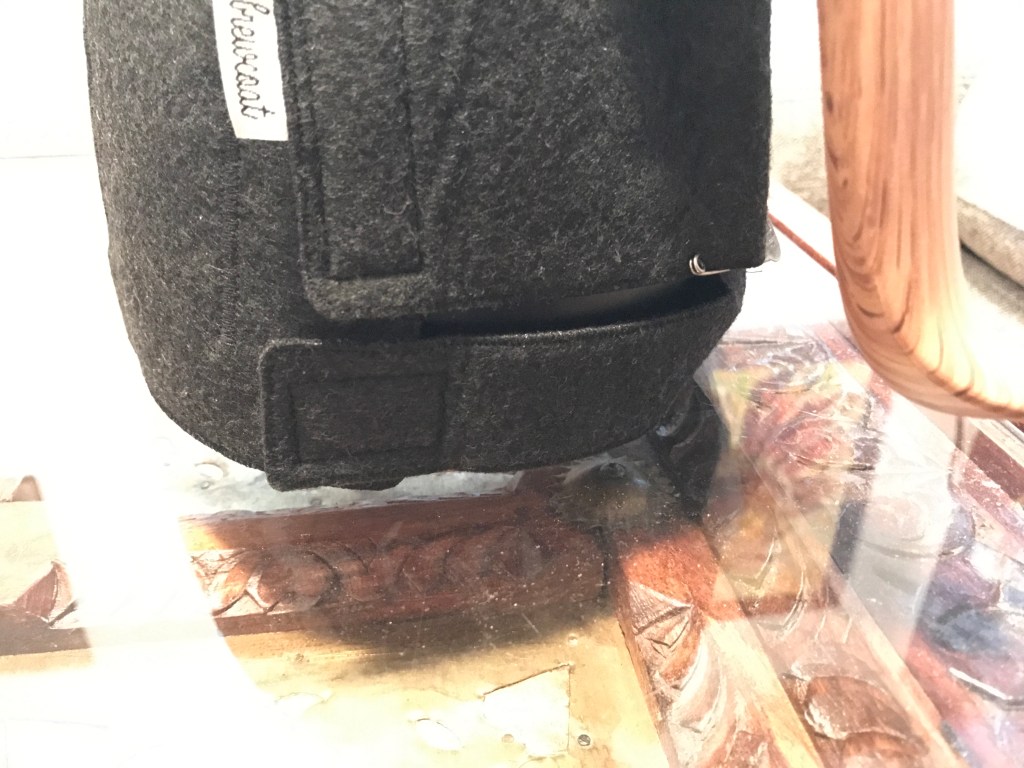
If you are a Patreon backer you might also know that a while back I had ordered a small sheet of aerogel, which is one of the most insulating materials that are known. I decided to use it to add an insert to the Brewcoat for even more crazy insulation:
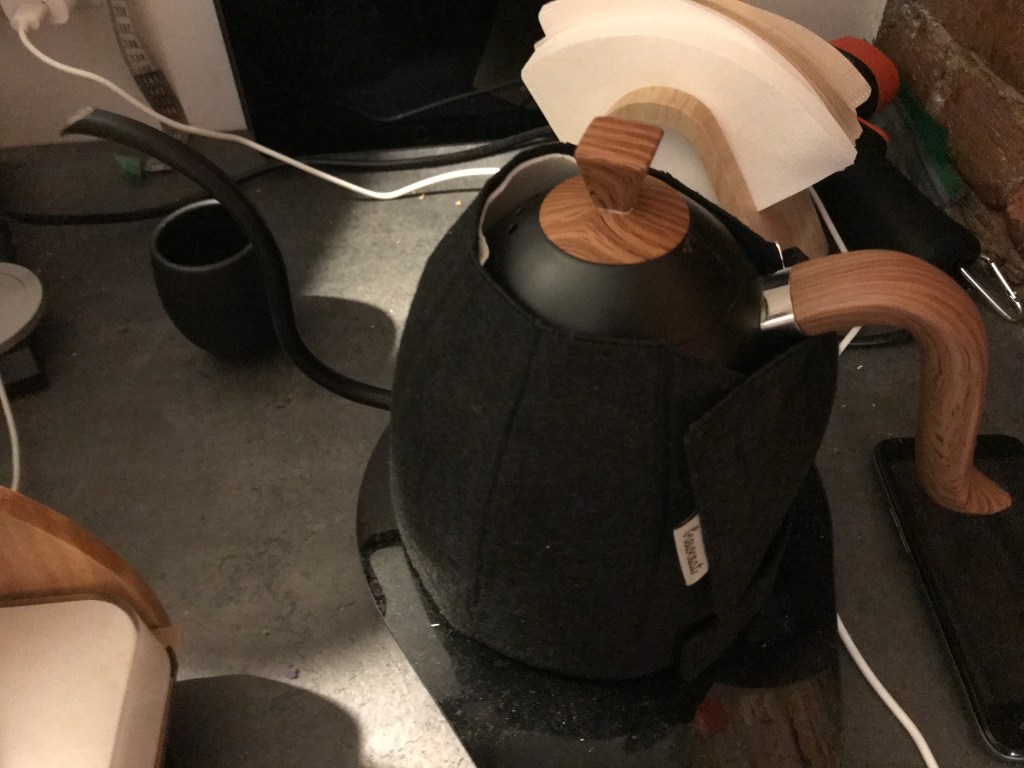
If you look carefully on the image above, you can see the additional layer of aerogel under the Brewcoat.
To investigate how each layer affected the kettle stability, I used cool Montreal tap water to rinse the kettle thoroughly and bring it down to the tap water temperature, then placed it on its turned off base with the Aerogel + Brewcoats with exactly 600.0g of cool tap water (this is the quoted capacity of the Brewista). The ambient temperature was 22°C (72°F) during the whole experiment. I made sure that the kettle lid was closed correctly and inserted my bead temperature probe in the vent holes of the lid all the way in to make sure the probe touched the bottom of the water.
I logged the temperature curve with the Thermoprobe BlueTherm One Bluetooth device (which is NIST calibrated to a precision of 0.7°F; a purchase made possible by the support of my Patreon backers !), turned on the kettle base and immediately pressed the “Quick Boil” button. When the temperature hit 212°F on the probe, I turned off the kettle base completely and waited for the probe to cool down to at 192°F or lower. Once that was achieved, I exported the temperature curve as CSV to build the figures and comparisons below.
I then repeated the exact same experiment with the Brewcoat only, and then using the kettle without any insulation. Between each experiment I thoroughly rinsed the kettle, temperature probe and kettle lid with cool tap water to bring its temperature down, then threw away the water and filled it again with cool tap water. Here are the resulting temperature curves, after I stitched their time axis to remove small delays from my manual inconsistencies:

You can immediately see that the “no insulation” case is much worse than the others ! In particular, it is very hard to keep the non-insulated kettle above 200°F, which is very consistent with my experience, as I constantly need to press the “quick boil” button between every pour during my V60 brews.
Adding the Brewcoat layer immediately makes things a lot better; there is no obvious gain in the time required to reach boiling temperature faster, but once this point is reached the cool down rate is massively reduced ! Even if you are using a kettle that doesn’t require you to constantly press “boil” every time you pick it up from the base, I suspect it will still have a hard time remaining close to 212°F unless the kettle is insulated with more than a thin layer of metal, because according to the purple curve above that will require a constant and significant energy input; this is also not very eco-friendly.
Another point that immediately becomes clear with the figure above is that adding a layer of aerogel provided significantly diminished returns, and would only be worthwhile if I planned to leave the kettle off for much more than 15 minutes. Maybe adding this aerogel layer could provide small energy savings over just the brewcoat in a coffee shop environment, but I doubt they would be significant.
I also built a small table to compare difference performance metrics of the three cases I experimented with:
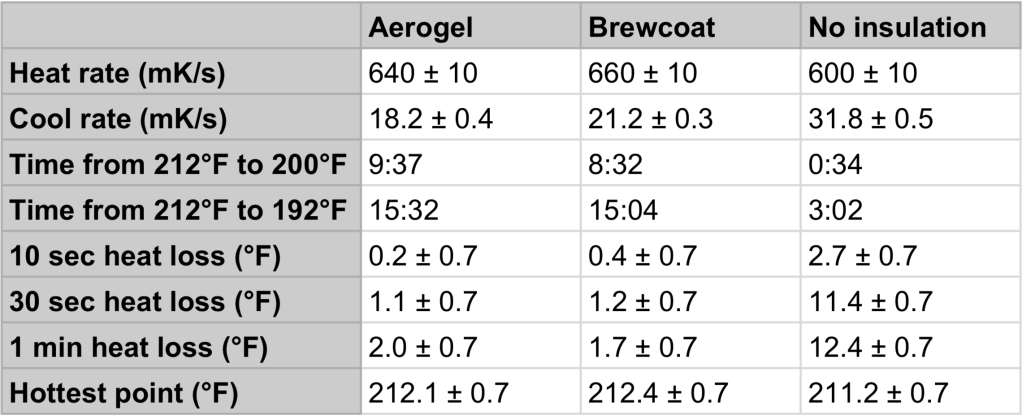
In this table, I calculated the median upward and downward slopes in the heat and cool down phases for each case. As we saw before, the heat rate isn’t significantly faster with additional insulation, but the cool down rates are significantly different with either types of insulation.
I also included how much time is needed after the kettle is left turned off from boiling point to reach 200°F and 192°F. The non-insulated kettle fell to 200°F in only 34 seconds ! This is not great, to say the least. The next few lines indicate how many degrees are lost for a 10 seconds, 30 seconds and 1 minute waits after the boiling point is reached if the base doesn’t immediately power the kettle back (e.g., if you forget to press “quick boil” again on the Brewista kettle). This also definitely applies for the duration of your pours, because no kettle can keep receiving energy as it’s off the base ! If you pour for a duration of 30 seconds, a non-insulated kettle will already have lost a whopping 10°F – that really surprised me, and it makes me wonder why V60 kettles don’t already come with an additional layer of insulation !
One other thing that I noticed during this experiment is that the Brewista temperature indicator is not always reliable. Without any insulation, the true temperature is almost always 20°F cooler than what the kettle base indicates, and the base indicates 212°F when the true temperature is at barely 196°F. If you wait enough to hear the water vapor hissing out of the vents however, then the true temperature is in the range 211-212°F, but that happened only about 15 seconds after the base indicated 212°F for me, so pay attention to sound not just the temperature reading of your kettle.
When I used only the Brewcoat, then the kettle base temperature was reliable within a degree, until I got past 200°F, where it got gradually worse; it indicated a temperature about 2°F higher than reality by 202°F, and the difference increased up to 6°F when the base indicated 212°F as the true water temperature was only 206°F. However, I only had to wait a few more seconds for the true water temperature to hit a stable 212°F as the water vapor started hissing through the vents. As far as I could tell, the case with a Brewcoat plus an aerogel layer was very similar.
I hope you found this as interesting as I did; it turns out we should worry about kettle insulation if we want to achieve the highest possible slurry temperatures in our V60s ! I will be gathering some more slurry temperature curves in the upcoming weeks, and I fully expect to see an increase of at least a few degrees, which is great because we are still much under the 205°F threshold where, in my syphon tests, brews started to taste worse.

Thanks again for another informative post.
I would assume the design and materials of the kettle would have a significant impact on its temperature stability as well as the accuracy of its temperature reading. It would be interesting to compare how other common models perform, although it would be a lot of work 🙂
Having to press a button every time you put the kettle back on the stand to maintain temperature is one of those minor annoyances I could do without! Definitely one of the advantages of the Fellow kettle is not having to do this.
Also, why so Farenheit? Ha ha this is science, show me your Kelvins! (actually no Celsius please 😛 )
LikeLike
Thanks ! Yes I think it will depend a lot on kettles. The biggest hurdle is that I don’t want to buy all different kettles 😂 we could take some more data when I come to the Academie if you have different kettles. Yeah I know Fahrenheits is a bad habit, I caught the USA virus, but only for kettle temps lol
LikeLike
Time to buy a sheet of aerogel and tailor it around my kettle. Is 3 mm thickness of aerogel enough? I have the option between 3 mm and 6 mm.
LikeLike
I think 3 mm may be enough. Make sure the sheet is large enough, and the one I got left a weird powder when touched which I really don’t think is food grade, so maybe you’ll need to wrap it in something heat resistant. This is why I opted for a brewcoat in the end (it’s also prettier).
LikeLike
I wouldn’t imagine the powder is great for your respiratory system, if it is silica based then it should at least be non-carcinogenic, but can still irritate your lungs etc, not fun.
I am looking at various possible materials for making a blanket, i have an old kettle/pot which isn’t covered by Brewcoat
I might just wrap it in a scarf lol
LikeLike
Haha a scarf might work as long as it doesnt catch fire
LikeLike
Hello Jonathan, I think you are doing a great job and contributing a lot with your experiments, thanks! I just wanted ask you a quick question to know if your Brewista kettle behaves the same way as mine. When I set the temperature to 93C, for example, it beeps when it achieves the temperature and reads “93” on the display, however when I remove it and instantly put it back on the base the display shows 96 or 97 instead of 93 as it was showing before… it takes a minute or two to the temperature to move back to 93C again. have you notice this behavior with yours? thank you
LikeLike
Hey Lucas, thanks for your comment ! That’s weird, it doesn’t happen to me. When I heat water up to 93C and pick up then put back the kettle, it reads 83C for about a second and then immediately refreshes to 93C. I tried without the brewcoat to replicate your setup. I took a short video, email me through my contact form if you’d like to get it. Maybe you can contact Brewista, but in my experience they never replied to my feedback.
LikeLike
Hey, Jonathan! good to hear from you! first of all, I wanted to say that I really enjoy your blog and it´s been really helpful for many reasons, secondly thanks for replay my message, I´ve been trying to figure it out what is happening to my new kettle and showing it to my friend in Hong Kong and here in Brazil to see if their kettle behave the same. i’m gonna send you some videos on instagram if that´s ok. my profile is @samulucas.art
all the best
LikeLike