
Photo by Noé Aubin-Cadot.
Reminder: as an Amazon Associate I earn small commissions from qualifying purchases made through the Amazon links below. I have no association to Fellow and don’t receive any benefits from posting this.
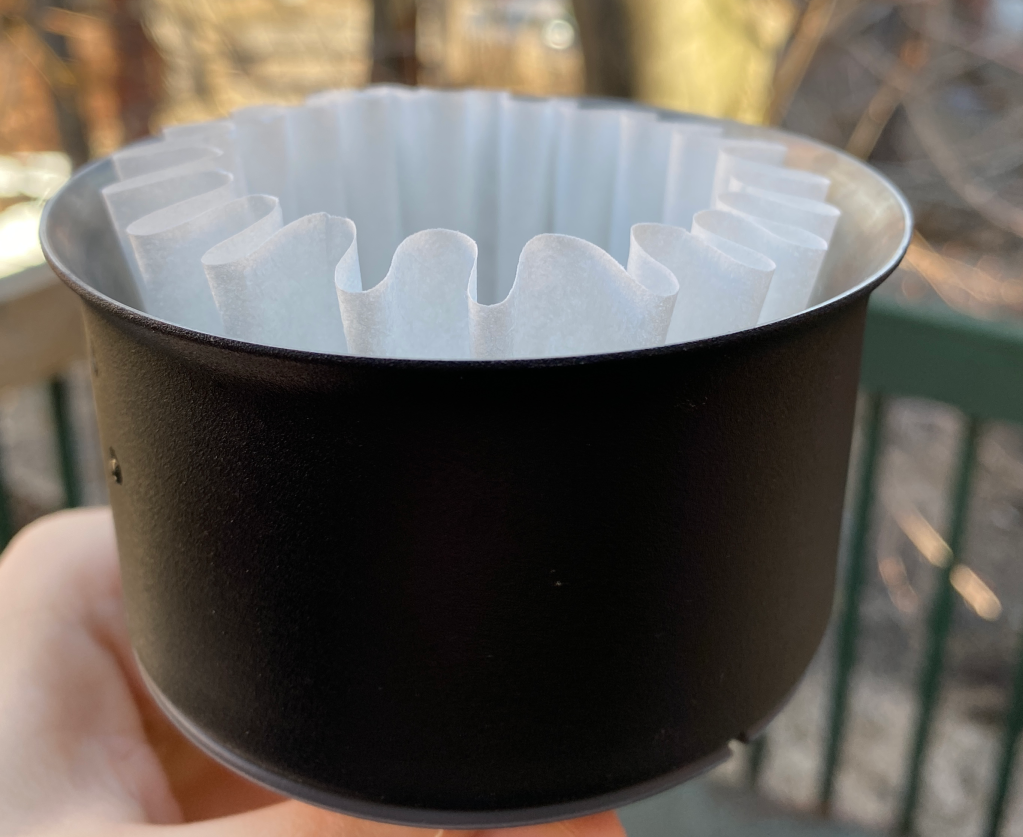
If you are a regular reader, you might have seen me writing a bit about the Fellow Stagg drippers. Six months ago, Fellow offered me their Stagg EKG 0.6L kettle for me to include it in my analysis of kettle streams, and they included an unexpected bonus in the package: their Stagg [XF] dripper. I had been brewing only V60s for more than a year at that point, and I did not really seek to try other dripper geometries. However, the Stagg immediately intrigued me with its design. For starters, it is a flat-bottom dripper, and comes with prepleated filters similar to Kalita filters, but produced by Fellow.
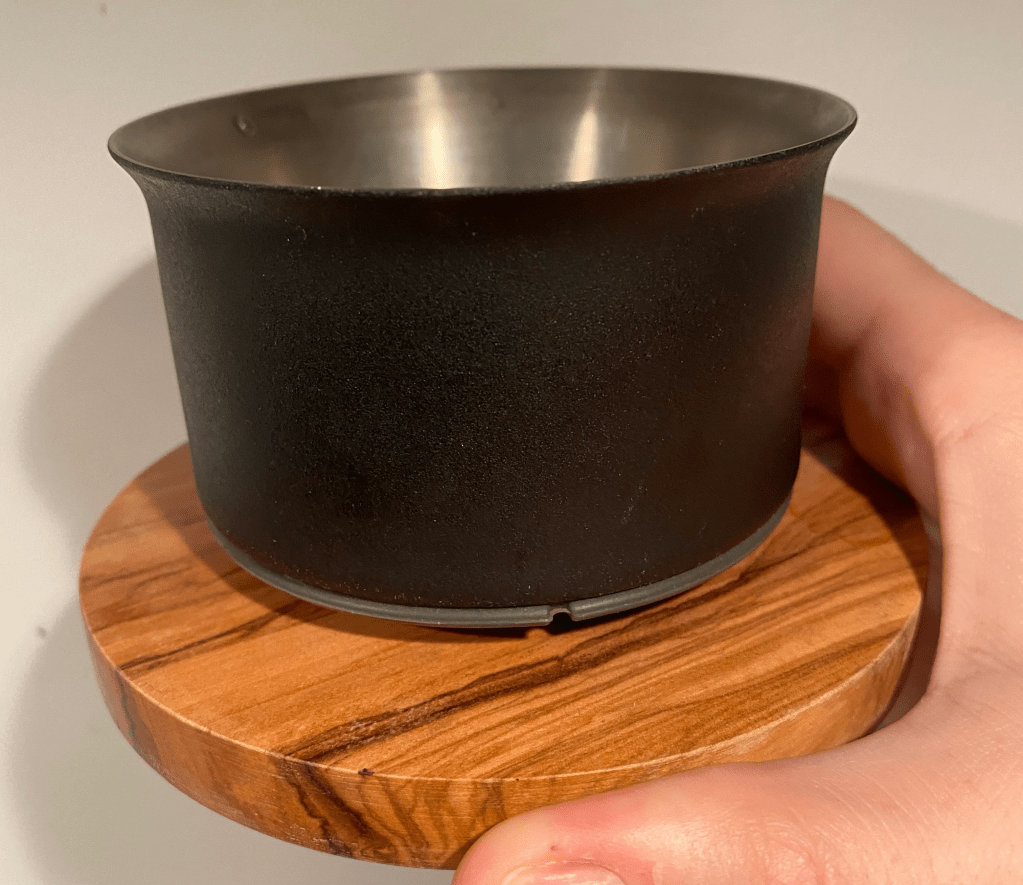
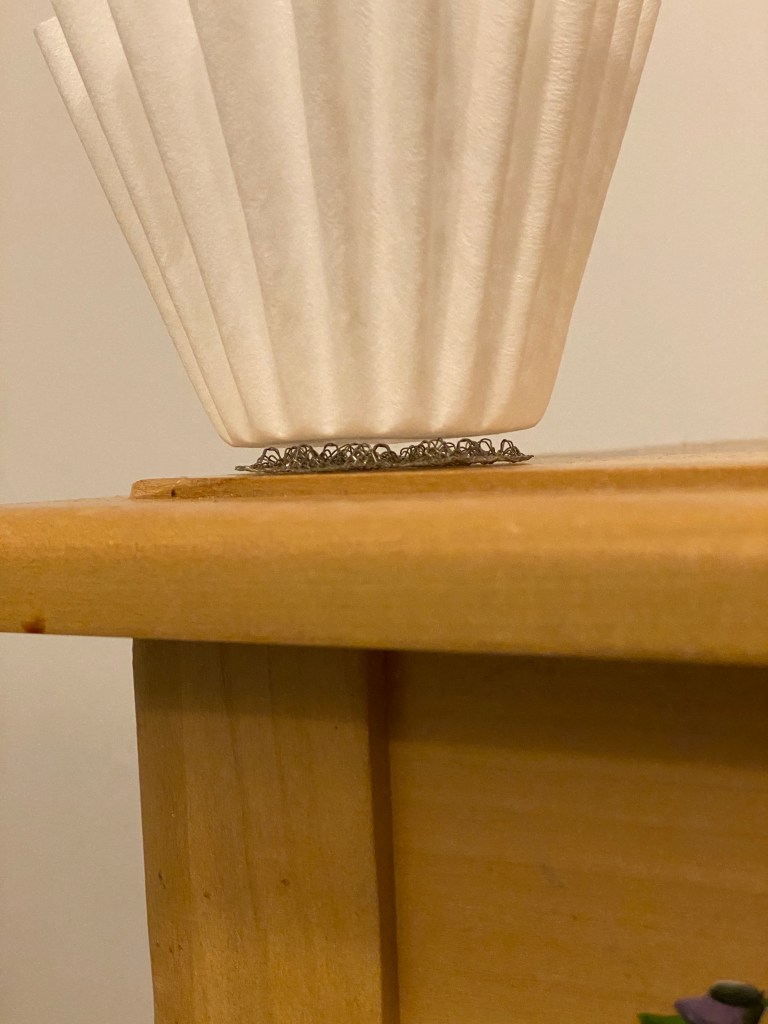
As you probably know, I like to swirl the dripper between every kettle pour, and the base design of the Stagg drippers doesn’t make this easy. Fortunately, the rubber ring at the bottom of the dripper can be taken off easily, but even without it, swirling is a bit awkward because the dripper can capsize. I found that the base of my Olivewood Hario V60 worked perfectly if I kept the rubber ring on and placed the dripper on the Olivewood base:
I know the Olivewood is quite expensive especially if you are just going to use the base, but I don’t know about a cheaper option currently. I’m sure some of you could fix this with 3D printers!
Despite these minor hurdles, I was immediately pleased when I first brewed with the Stagg. My brews seemed noticeably sweeter than those I made with the V60, using the same coffee and grind size. One thing I did not like about the Stagg [XF] is that I needed to use a lot more water to pre-rinse the filters because they are a lot taller. They are so tall that not pre-rinsing them carefully or with enough water caused them to leave a slight papery taste in the cup. This is the only time I have ever noticed this with bleached filters, but they also weigh a lot more than typical pourover filters. Quite surprisingly, they did not impart a bad taste at all, but I prefer my coffee untainted. The Stagg [XF] dripper is also quite tall and narrow, and this makes it harder to control how and where your kettle stream lands on the slurry. I mentioned that to Fellow, and they immediately sent me their Stagg [X]!
Turns out not only I preferred the Stagg [X] over the [XF], I preferred it so much over the V60 that I only alternated between the two drippers for a dozen brews, and then I switched to using exclusively the Stagg [X] ever since. Six months and more than 400 brews later, I’m finally ready to write about this.
The reason why I prefer the Stagg [X] brews over the V60 is simple: I prefer the taste of the coffee it brews. As I mentioned, I find it sweeter and less sour. I think this is caused by two things: a higher slurry temperature due to the better thermal insulation, and a more even flow through the full coffee bed that leads to a more even extraction. I tested the slurry temperature with my K-type Thermoworks temperature logger, by placing 100 mL of hot water in different drippers and observing how the temperature evolves when the flow holes are blocked:
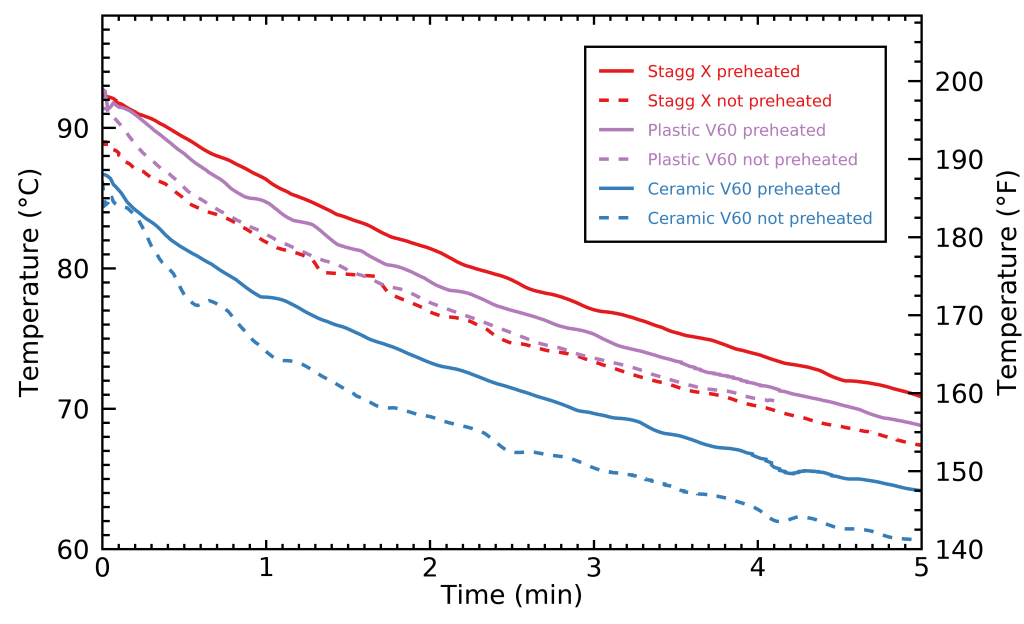
As the data show, the Stagg [X] slurry was indeed slightly warmer and more stable than the V60 slurry. I tried comparing the Stagg [X] to the V60 with the exact same parameters, namely a 25.0 grams dose, a 1:17 ratio, 4 pours with the exact same timing and flow rate, the same Hario tabless V60 filters and ColorFull Coffee Corp‘s delicious Sun Blood decaf. I used a 210°F (99°C) kettle temperature with the Plastic V60, and a 202°F (94°C) kettle temperature with the Stagg [X], as previous experiments showed that this was the way to obtain an average slurry temperature of 191°F (88°C) during the brew, in both cases. I measured the concentration of the brews using a VST refractometer and found 1.34% TDS for both brews, corresponding to an average extraction yield of exactly 19.9% in both cases (keep in mind that this is not low for a decaffeinated coffee). The V60 brew had quite a longer brew time, however, clocking in at 5:40 compared with 5:01 for the Stagg [X]. This longer brew time is not too unexpected, as the V shape of the V60 makes the same dose of coffee taller. The resulting brews tasted quite different: the V60 brew had almost no sweetness and had a bit of an ashy aftertaste probably due to some regions of the coffee bed getting over extracted, and the Stagg [X] brew was jammy, sweet and fruity. This comparison is interesting to me, because it means there is something more to just a better thermal insulation with the Stagg [X], despite the two brews having the same average extraction yield. I suspect that figuring out what coffee dose gets me the same shorter brew time with the V60 would reveal it to have a slightly lower average extraction yield.
This was good timing, because I was thinking a lot about dripper geometries to write the percolation chapter of my upcoming coffee book The Physics of Filter Coffee, and I was gradually discovering that water does not flow at all like I expected or wished for when brewing with the V60. By simultaneously measuring my pour rate and the drip rate of the V60 with two scales connected to my friend Francisco’s web app, I was able to deduce the height of the water in the dripper at every moment of the brew, as well as the hydraulic resistance of the whole dripper, filter and coffee bed system. Hydraulic resistance is a quantity that represents how much the combined effects of the dripper, filter and coffee bed are preventing the water from flowing down very fast. Without going too deep into the weeds (this is what the book will be for!), these data really convinced me without a doubt that some significant amount of water was bypassing the coffee bed, i.e. flowing around it rather than through the coffee.
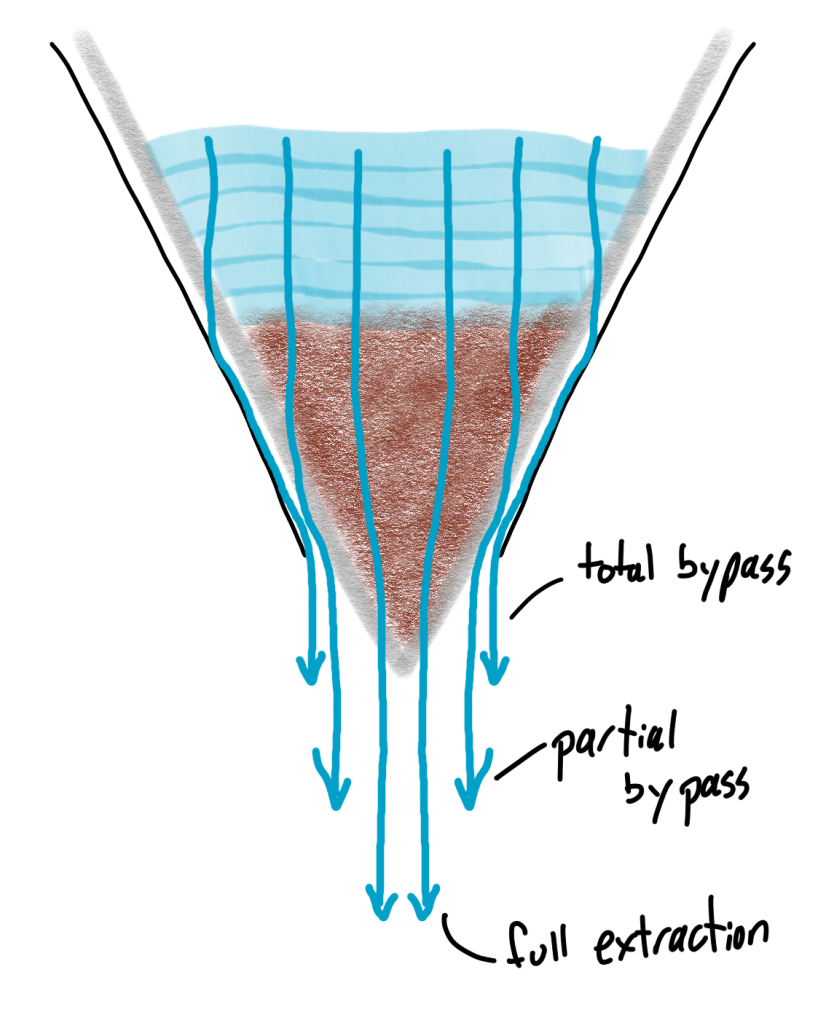
This effect is usually called bypass, and has been discussed a lot in the coffee community. I was previously skeptical about it and I thought that very little water bypassed around the V60 bed, because I had never seen hard data to support the idea. I don’t blame the coffee community for that, because it is not easy to measure this effect accurately. Some recommend to always pour at the center of the slurry to prevent bypass, but this is like deciding to fight against the ocean by punching it. Regardless of where you pour water, it will find the path of least resistance and flow mostly there. Pouring at the center of the slurry and hoping to avoid bypass is thus a lot like pouring at the center of a dining plate to prevent water from spilling out. As soon as the water level gets high enough, it will flow around the plate as much as it likes. The same is true with the V60, and most other drippers. If the level of water becomes high enough that it touches some free paper filter that does not stick closely against a dripper wall, some of this water will go through the filter, regardless of where you pour.
Bypass is not necessarily a terrible thing when water flows completely around the coffee bed: it will just make your beverage more diluted. You would need to pour more water to reach the same average extraction yield compared with a brew where water does not bypass, and the resulting cup would thus be less concentrated. The part that I find desirable at all is where water can also flow through only part of the coffee bed, and then escape midway. When this happens, less water will reach the bottom of the coffee bed, and the bottom will remain less extracted than the surface layers of the coffee bed. This is where dripper geometry becomes important: a conical dripper will allow water to escape from the middle of the coffee bed, whereas a cylindrical dripper won’t allow this as easily.
You might think that a solution against this problem would be to agitate the coffee bed very deeply in a conical dripper, to make sure that the bottom is well extracted. You wouldn’t be wrong at all, but this brings out other complications: such deep agitation will allow very fine coffee powder to be dislodged more easily from the larger coffee particles, and this migration of the fines can completely clog the paper filter. Because clogging tends to leave very few spots of lower resistance in the filter, a large fraction of the water will be forced to flow there, and this uneven flow will usually cause small regions of the coffee bed to become over-extracted, and will result in harsher and more astringent brews. I suspect this might also affect brew clarity, for the same reason, although I have not verified this with measurements yet.
Using smaller pours is yet another strategy to minimize bypass. This will definitely minimize the amount of water that completely bypasses around the coffee bed, but it won’t prevent water from bypassing midway through the coffee bed. This strategy will also lower the slurry temperature, and lead to lower average extraction yields and different flavor profiles that I tend to like less.
Another solution could be to remove the ridges in a conical brewer, much like the upper half of the Kono Meimon dripper. However, this creates another issue: water will only flow through a small opening near the bottom of the dripper, which means that any coffee fines liberated with the flow will be trapped in a smaller surface area of paper filter. This will make the dripper more susceptible to clogging, as I quickly discovered when my friend Dan Eils sent me a 3D-printed ridgeless V60. If you are skeptical of this, I suggest to try an eye-opening experiment: take a glass V60 dripper that does not have a base at the bottom, and place a paper filter at the bottom of the opening outside the dripper. Use an elastic to hold it in place, then try brewing coffee with this. You will experience a surprisingly slow flow, if not an immediate clogging of the filter. This is a nice demonstration of how the total surface area of paper filter really matters for clogging. Remember that only the filter surface that is not pressed against a solid surface counts, because water cannot go through the filter efficiently elsewhere.

In other words, the V60 sacrifices some evenness of extraction (the bottom of the coffee bed is harder to extract well), in exchange for a more easily maintained flow of water and less clogging. This is true because it has a very large free filter area compared to the volume of the coffee bed. Flat-bottom drippers face the challenge of having less free filter surface for each gram of coffee.
If you think about it, you will realize that this is also why both the Kalita and the Stagg have ribs at the bottom. They are there to lift the filter, and prevent it from collapsing into the dripper holes. If the filter does collapse, water can only flow through a minuscule surface area of free paper filter, and it will immediately clog. You might have experienced this with the Kalita: if you then just gently lift the filter, water will start flowing again because you have increased its free surface dramatically.
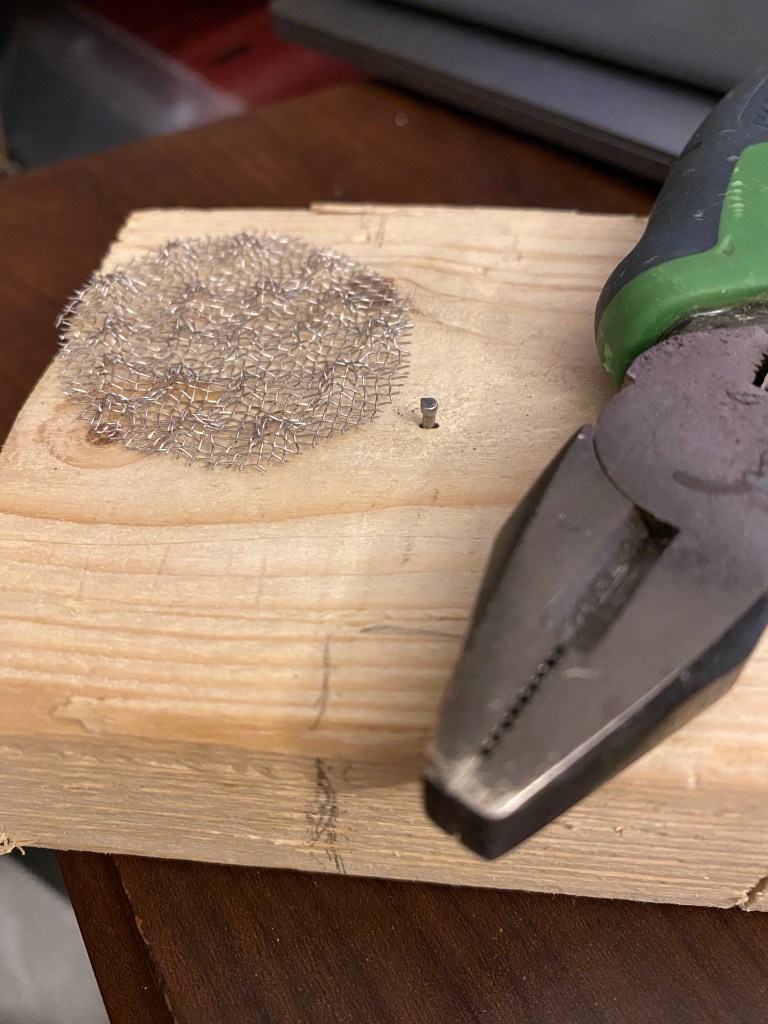
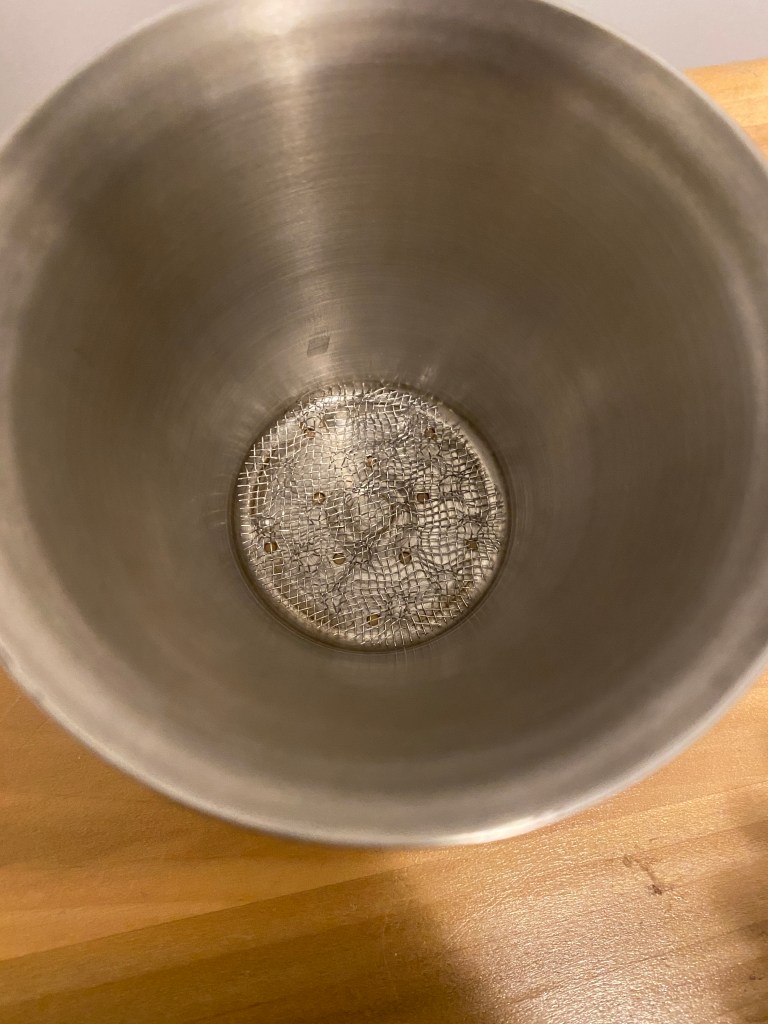
The Stagg dripper is definitely an improvement over the Kalita in this respect, because it has more holes and wider, more evenly distributed ridges. However, I don’t think they are deep enough: I have experienced clogging several times when I first started brewing with the Stagg. Ray Murakawa suggested placing a few whole coffee beans at the bottom of the dripper to avoid this. This solution works, but I didn’t really love it because it can easily lead to an uneven coffee bed and makes it harder to get an even flow. Scott Rao had a nice idea that turned out to work much better for me: cutting out a tea strainer mesh, and placing it at the bottom of the dripper.

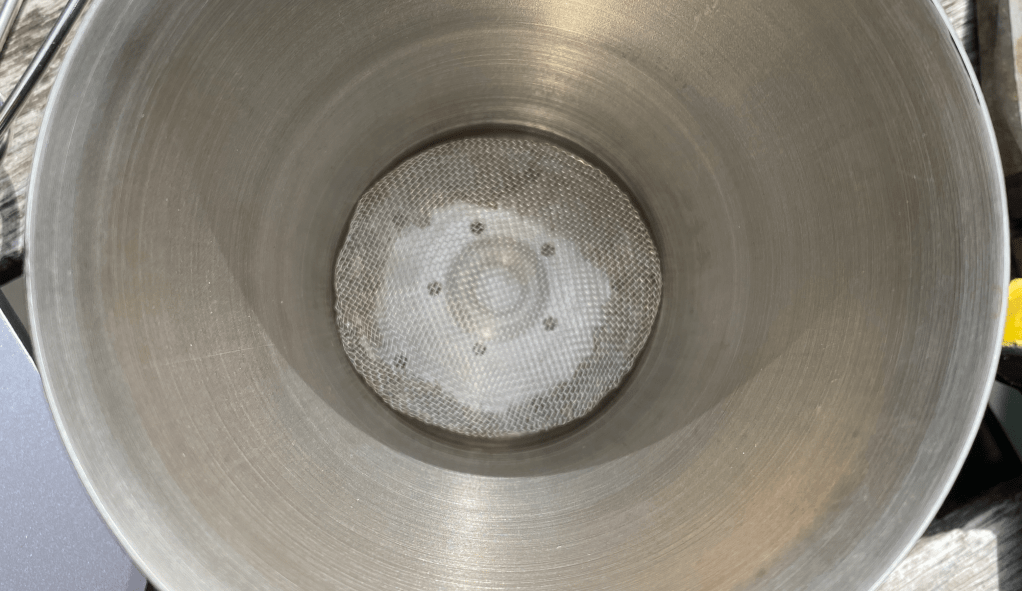
Although I don’t think this is the ideal solution, it seems to be one of the best options that can be easily done at home. It completely fixed the issue of clogging for me when I used it with the prepleated Stagg filters. However, prepleated filters are also problematic in my view because they still allow for some bypass, and even probably allow for some water to escape from the middle parts of the coffee bed, although this will definitely not be as much of an issue than it is with a conical dripper. This is probably what pushed others like Scott Rao and Matt Leberman to prefer brews made with a V60 filter that is forced into the Stagg dripper after pre-wetting it.
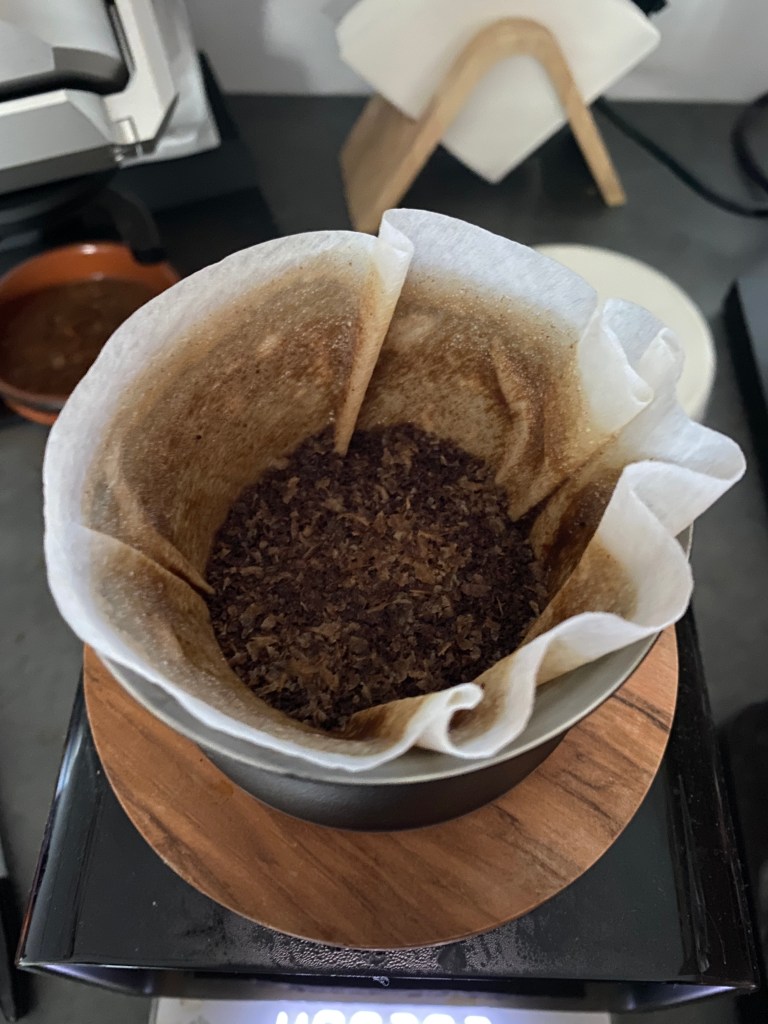
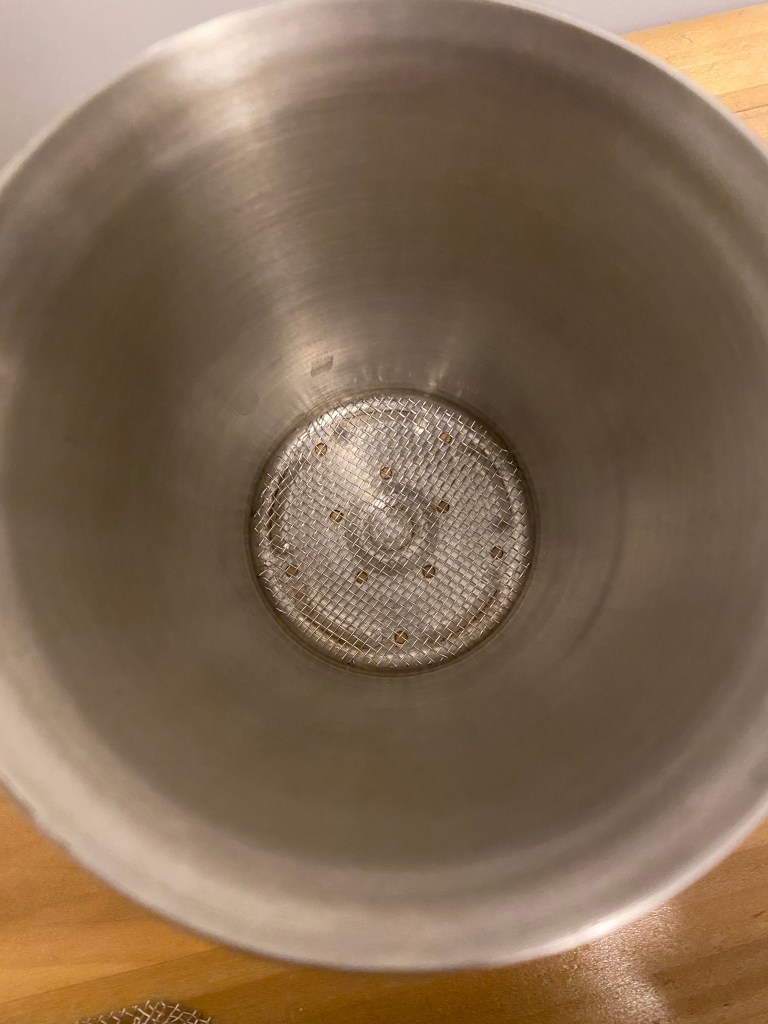
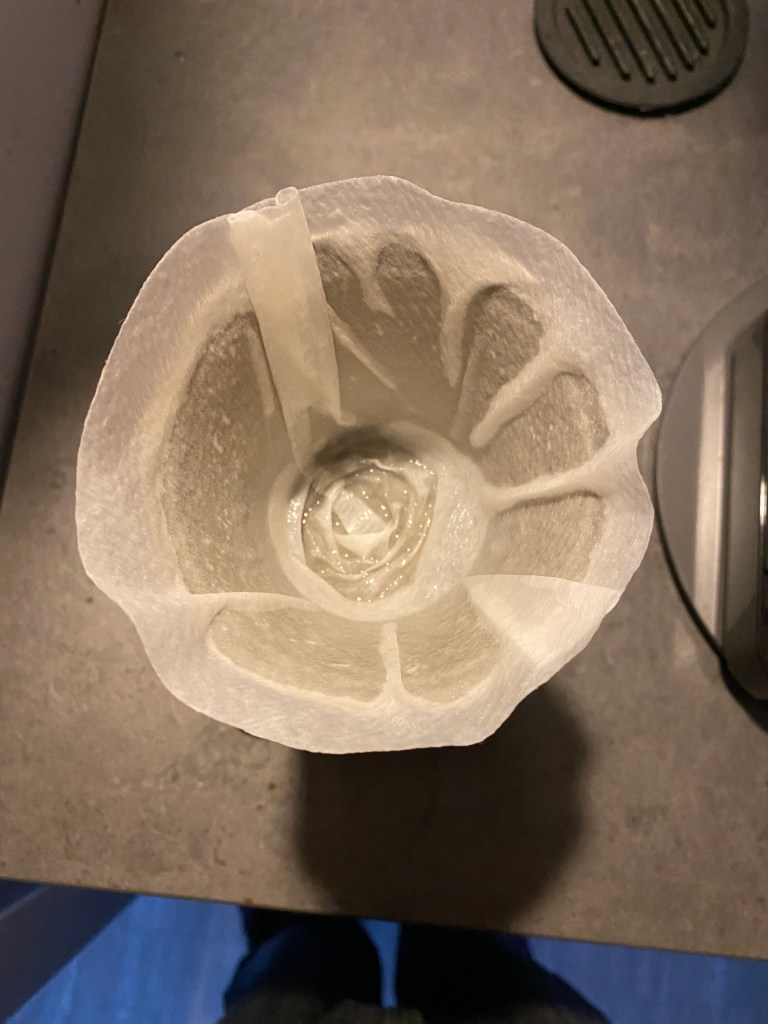
This may look messy, but it is quite clever. It forces the filter to adhere on the walls of the dripper, thus minimizing bypass and giving you more surface for pouring and more volume for water. It’s also not the perfect solution because it will be hard to always place the filter in the exact same way, and thus may lead to different brew times, and different amounts of bypass. It also becomes important to use a tea strainer mesh, because the elimination of bypass means that the dripper will become even more susceptible to clogging. I tried to bring further improvements to the filter mesh, by poking it with a drill bit and causing it to have a “spiky” shape:

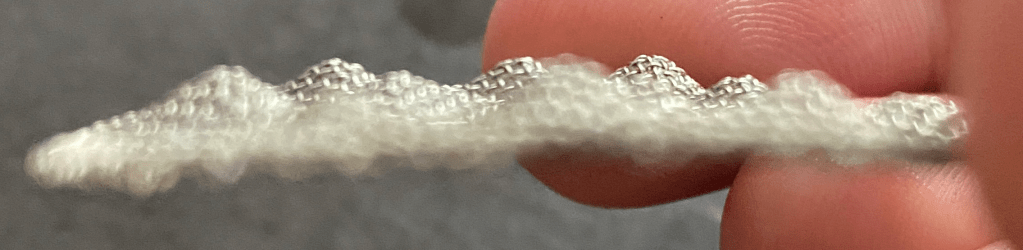
The idea behind this is to minimize the amount of contact between the mesh and the filter, and therefore increase the total free surface area of the filter. I found that it helped with flow, especially when the filter is pressed against the dripper walls. However, I did not get as many spikes as I would like, and they are not of the same exact height. This makes it a bit harder to obtain a flat coffee bed and an even flow.
If you prefer to use the Stagg filters and don’t mind the extra minute, you can place one in the dripper as usual, pre-wet it and then press each filter fold against the dripper with a finger until they all adhere to the dripper wall:
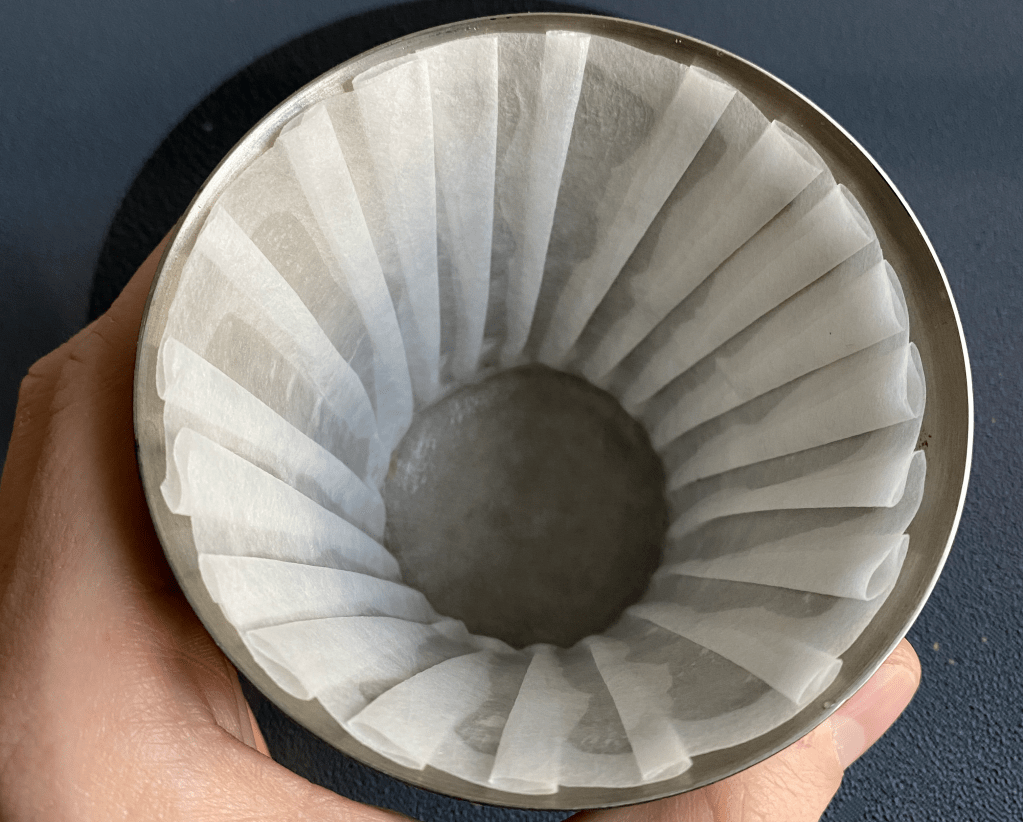
I won’t go into filter properties too much here (this will be discussed in great length in the book), but the quality of pores in the Stagg filters is not as great as those of the Hario tabless V60 filters. The V60 filters are also a lot thicker, even though the Stagg filters feel thicker because they are just more rigid. The better pores and increased thickness make the V60 filters more interesting to me, but I’m a bit bothered by the worse repeatability that is caused by the messy filter placement.
Here is the recipe that I currently follow when I brew with the Stagg [X] dripper. I don’t think it’s the only good way to use it, but this has worked well for me over the past few months:
- Use between 22 and 26 grams of coffee (I personally like to use 25 grams).
- Use a coffee-to-water ratio that suits your grinder and personal preference of extraction yield versus beverage strength combination. I usually brew with 17:1.
- I recommend making a nest shape in the dry coffee bed, and start pouring in the hole during the bloom step. This may seem counterintuitive, but I think this helps getting water through the bottom layers of the coffee bed a bit faster even with flat-bottom drippers.
- Pour about 2.5 to 3.5 grams of water per gram of dry coffee dose for the bloom step. You want to have enough water that you can immediately give the dripper a good swirl to make the surface of the coffee bed even before all water has dripped out.
- I use the same grind size as I would for V60, and the same pouring patterns (anything that covers the full surface, for example spirals). I also use the same pour height (just below the point where it splatters), and the same pour rate of 5-6 g/s (as described here, this depends on your kettle). Several people pointed out to me that the breakup length of a kettle is reduced when pouring hotter water. I think this is indeed true, but it doesn’t change my recommendation of pouring just below the height where it splatters.
- I still use very hot water most of the time (210°F, 99°C). The only reason I don’t use a running boil is to avoid getting an unstable kettle stream, or even spurting. I lower my kettle temperature to 205°F (96°C) when I don’t know a roaster well, because it minimizes roastiness (burnt and bitter taste) when a coffee is roasted darker. I have gotten good results with kettle temperatures as low as 190°F (88°C) when coffee was roasted even darker, but I tend to prefer roasts that are well matched to hotter water.
- I tend to use about 4 pours when I brew with the Stagg (not counting the bloom), rather than only two as I used to brew with the V60. The better heat insulation makes this possible, and you will be forced to do this if you use the Stagg [X] with non-folded prepleated filters because of the smaller dripper volume. I really like the brews that this produces, but it makes it a lot harder to keep track of pour sizes and the timing of pours, especially given that different coffees tend to flow at different rates. I currently start a new pour whenever the water level goes lower than about one inch above the coffee bed, and I am not particularly great at keeping track of my pour sizes, although I try to keep them around 90 grams each.
- I swirl the dripper very gently just after every kettle pour for about half a second (I swirl the bloom more vigorously, and for 2-3 seconds).
- I use prepleated Stagg filters as intended the first time I brew a bag of coffee, with the flat tea strainer mesh. If I don’t get very long brew times (about 3:45 or more for me, but this depends on your grinder), I will tend either press the filter folds against the dripper walls with the spiked tea strainer mesh, or use a V60 filter with the flat tea strainer mesh. Combining the V60 filter with the spiked mesh won’t help as much, because the V60 filter will collapse between the spikes anyway when it is forced inside the dripper.
- Immediately take out the spent coffee and filter and rinse the dripper and mesh. Avoid to let the coffee steep in there because that will stain the dripper with stale coffee oils much faster.
You can find a video of an example brew I made here. This coffee was a really nice washed Ethiopian Yirgacheffe roasted by my friend Andy Kires (the roaster behind Colorfull). I used a 25.3 grams coffee dose and 430 grams of water for a 1:17 ratio, and I obtained a brew with a 1.53% TDS concentration, for an average extraction yield of 22.1%.
You might have guessed it from the brew guide above: although I prefer the taste of my Stagg [X] brews over the V60, and they tend to reach higher average extraction yields in part due to the higher achievable slurry temperature, I do not obtain the same level of repeatability as I did for the V60. As I showed in a previous post, my 2-pour V60 brews were typically repeatable within 0.2% extraction yield, but my Stagg [X] brews have a worse stability with a larger spread of about 0.3—0.4% in average extraction yield. I’m pretty sure this is mainly due to two things: it is harder to replicate the mesh and filter placement exactly, and it is harder to keep precise track of more kettle pours. This means the V60 was a great tool for experimenting, and it allowed me to generate many figures based on several hundred repeatable brews for my book. But now, I really enjoy this improved taste even at the cost of a little repeatability!
Note: Since I released this blog post on Patreon a few months ago, I have switched to using a coarser mesh at the bottom of the Stagg [X], which I made from a pasta strainer. I also made a version where I imprinted spikes by wrapping the mesh around a nail with pliers. I found that it works best with the V60 filter to ensure that you still get enough flow by minimizing the contact between even the mesh and the paper filter.
Note that a coarse but flat mesh works very well with the Stagg [X] filters too. I find this combination useful with coffees that otherwise choke the V60 filter or otherwise take a lot more than 5 minutes to brew.
I have also received several questions about how I place the V60 filters in the Stagg [X]; I now simply place the dry filter on top of the dripped (with the point of the V shape standing in at the bottom of the dripper) and then run some faucet water in the middle. The faucet pressure collapses the filter, and I help it fall down with my hand until the filter sticks to the walls well. I then press any folds to the walls to, like this:

Hi, Thanks for the great post. I think I will try switching to flat bed brewer to try out as well. One brewer that has been very interesting to me is the April Brewer (https://www.youtube.com/watch?v=fckTOjMBQr4) which seems to solve a lot of problems that the Kalita has. I think it may be worth checking out.
LikeLike
Have you tried Espro Bloom?
LikeLike
Hi Jonathan. This post is very interesting. I’m considering buying a stagg x, but I was wondering if you think that 20g would be a viable dose, as opposed to your recommended 22-26g. That amount makes a little more than I usually want to drink at once, but 20g is about perfect for me. Thanks!
LikeLike
I think you’ll probably be fine with 20 grams. Worst case scenario, it will just be a bit harder to get it perfectly flat at the end.
LikeLike
Thank you very much!
LikeLike
The Stagg X is my favorite dripper. I use a stainless steel dispersion screen from Flair Espresso in the bottom of my Stagg. Works wonders and fits perfectly. I can send you some pics of it in the Stagg if you’d like.
LikeLike
I have been using a V60 but thought that I would experiment with the Fellow Stagg X given your excellent post above. Just 3 brews into the experiment (1x 300g/18g and 2x500g/30g versions using stagg filter) and i am very impressed. Initial impressions would say tastier but need to collect more data. For those switching from V60 who might already have a ‘Hario Drip Decanter Pourover Coffee Brewer Server’ (https://www.hario.co.uk/products/hario-v60-drip-decanter-pour-over-coffee-maker-700ml) i can report that it does ‘fit’ the Stagg X good enough to swirl sufficiently without concern. Not suggesting you buy one but it can serve as a temporary (or longer) solution if you already have it. Thank you Jonathan and I very much looking for forward to reading your upcoming book.
LikeLike
I’m unsure if you’ve already been told but people have been getting very fast flow using the Kalita 185 filters on the Stagg X!
LikeLike
Great info, thanks!
It’s a shame such a highly priced pour-over needs modding to work properly, but would you still recommend the Stagg X/XF at this time? I’d probably use V60 filters since the cost of the others is too much.
LikeLike
Well, I don’t think it’s a matter of making a cheap product on purpose. Stagg is just a design similar to what has always been done with several neat improvements, I just think it’s possible to do better now that we understand the details of what’s going on. I’d still recommend a Stagg if you want to do some more classical pour overs, or something like a Tricolate if you want to try no-bypass.
LikeLike